Kuggköping 4d
Time for a smaller Kuggköping update!
This update has a couple of small tweaks for the core game. Among other things, the explorer unions have been balanced a little bit better.
Hope you enjoy it!

Time for a smaller Kuggköping update!
This update has a couple of small tweaks for the core game. Among other things, the explorer unions have been balanced a little bit better.
Hope you enjoy it!
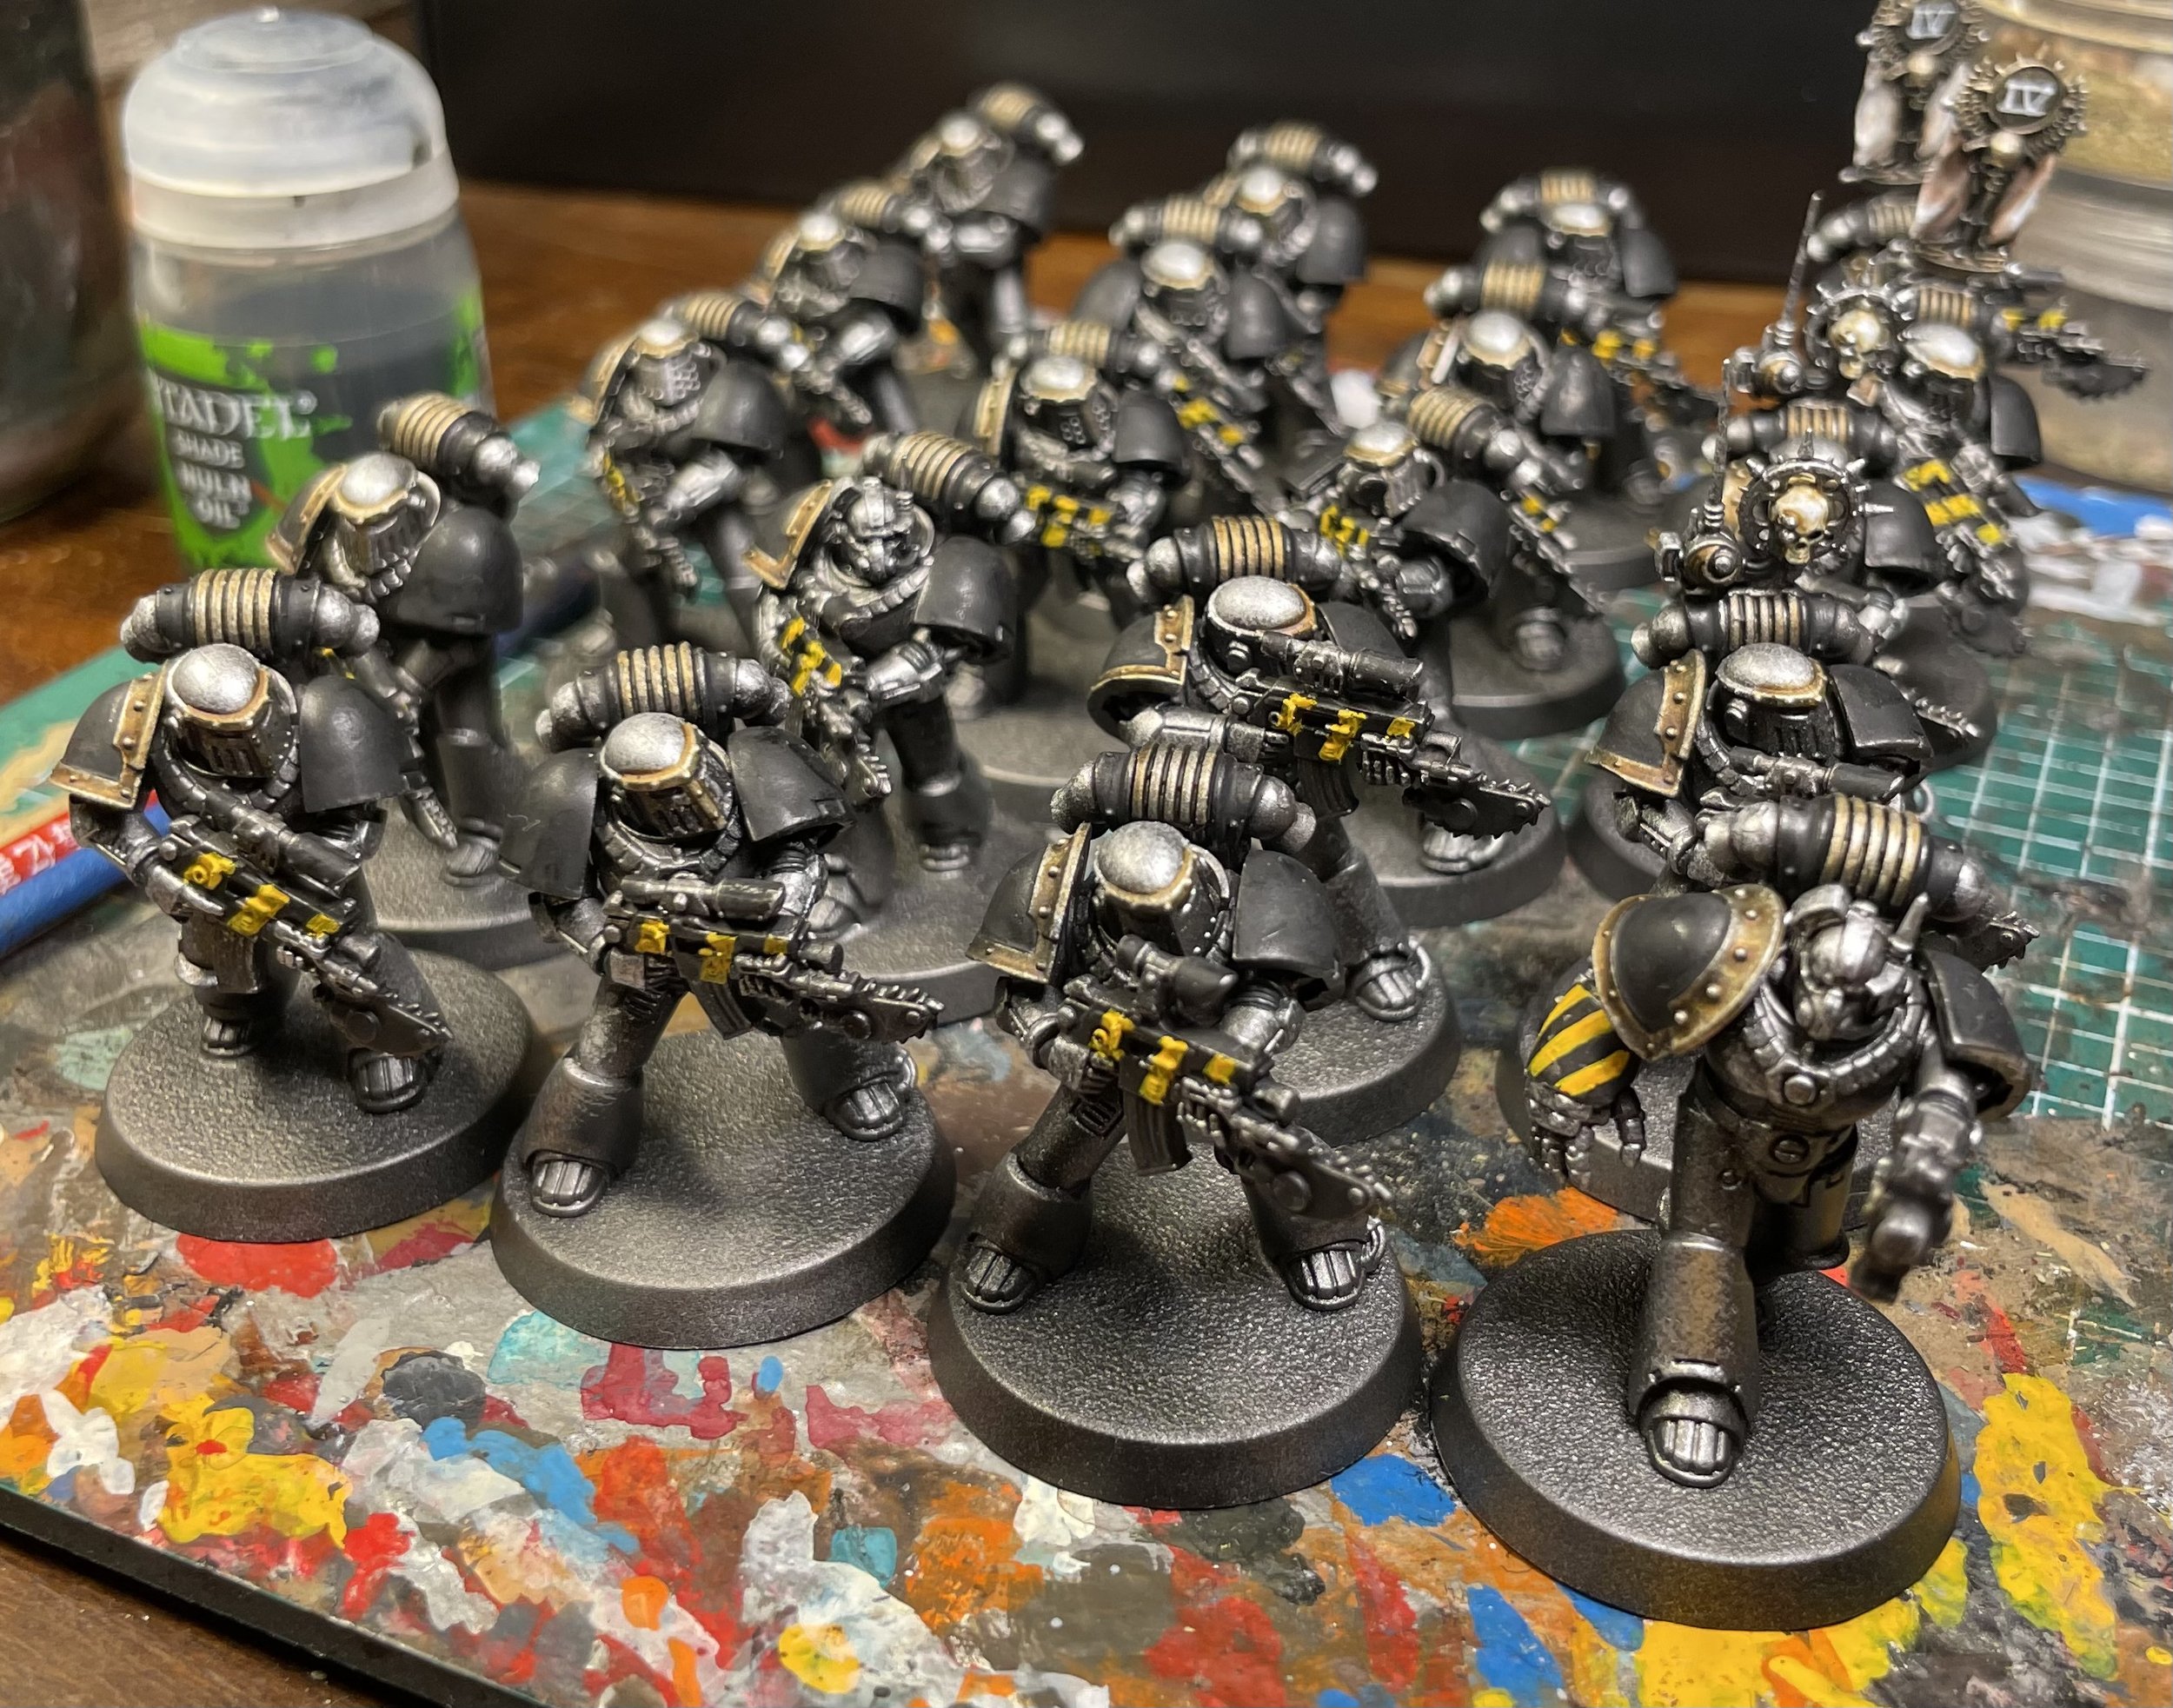
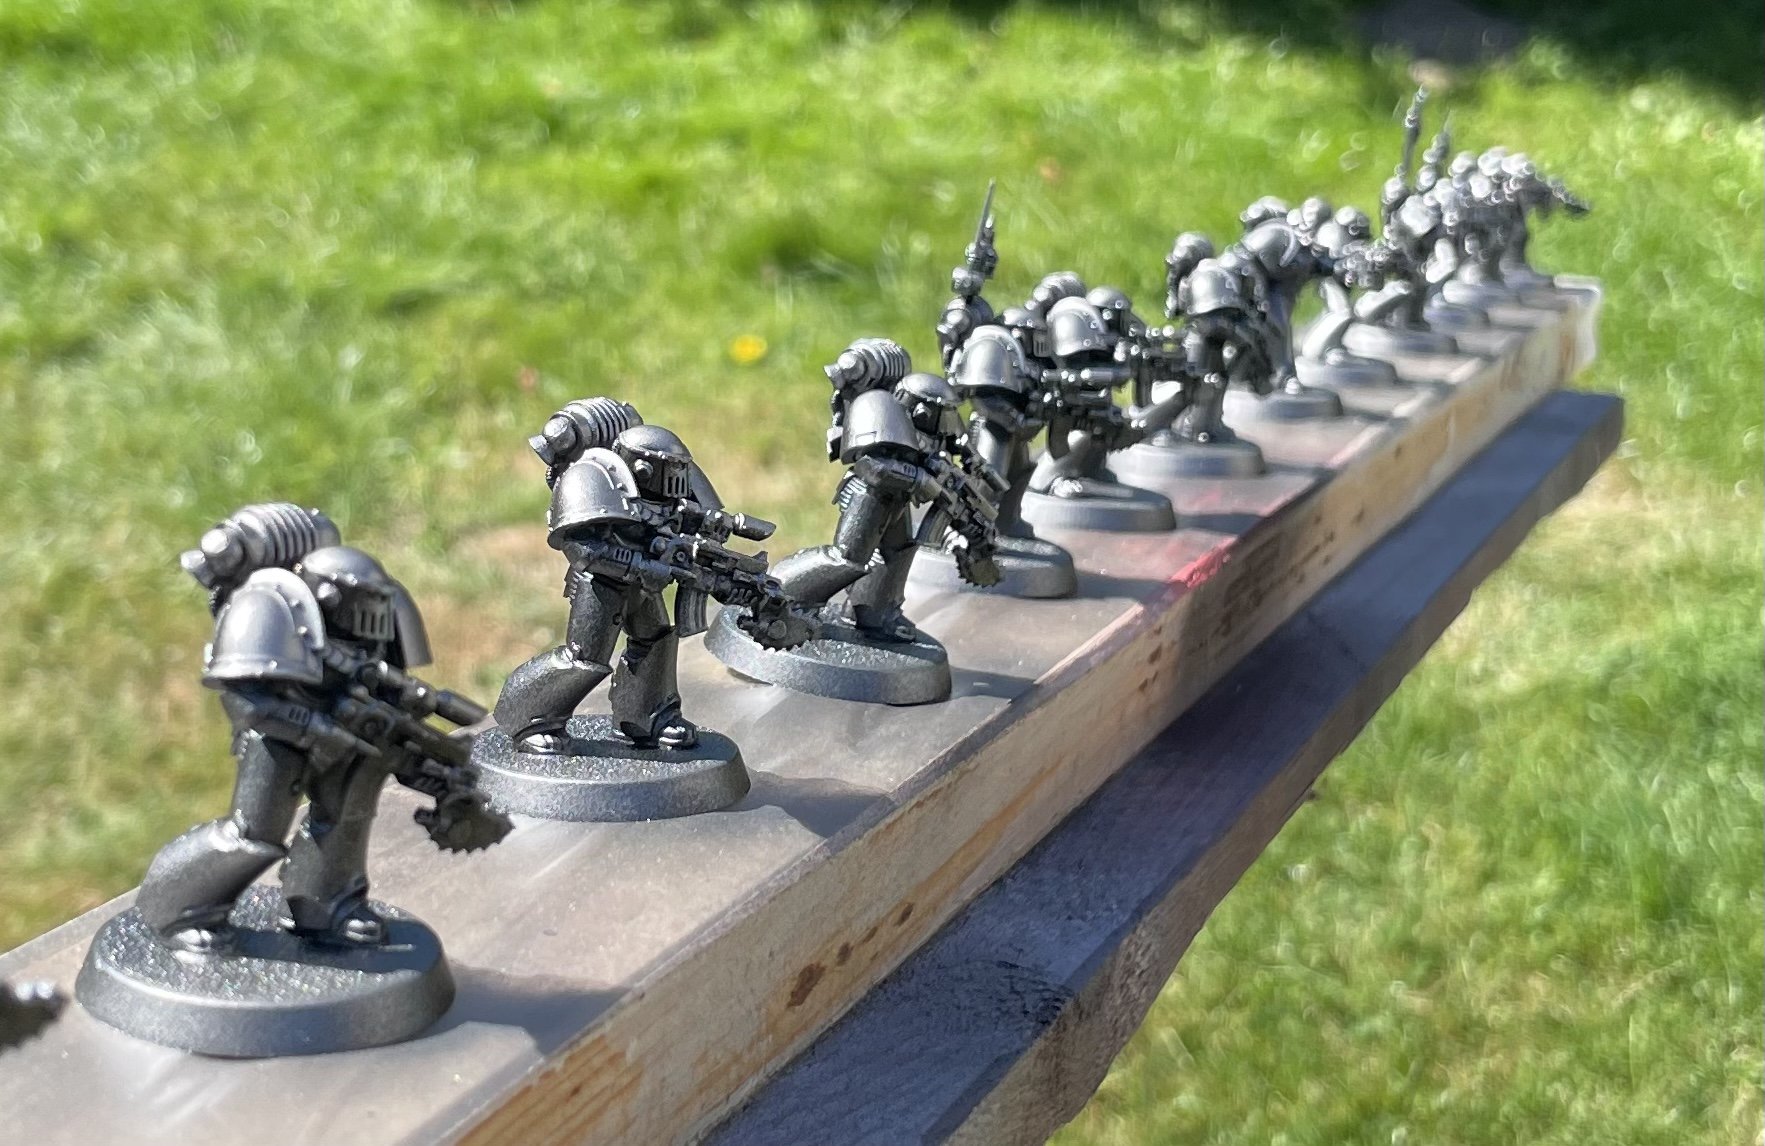
Here they are. This took longer than expected to finish. I have had a lot to do at work so my forth legion have not been getting the attention I wanted to give them.
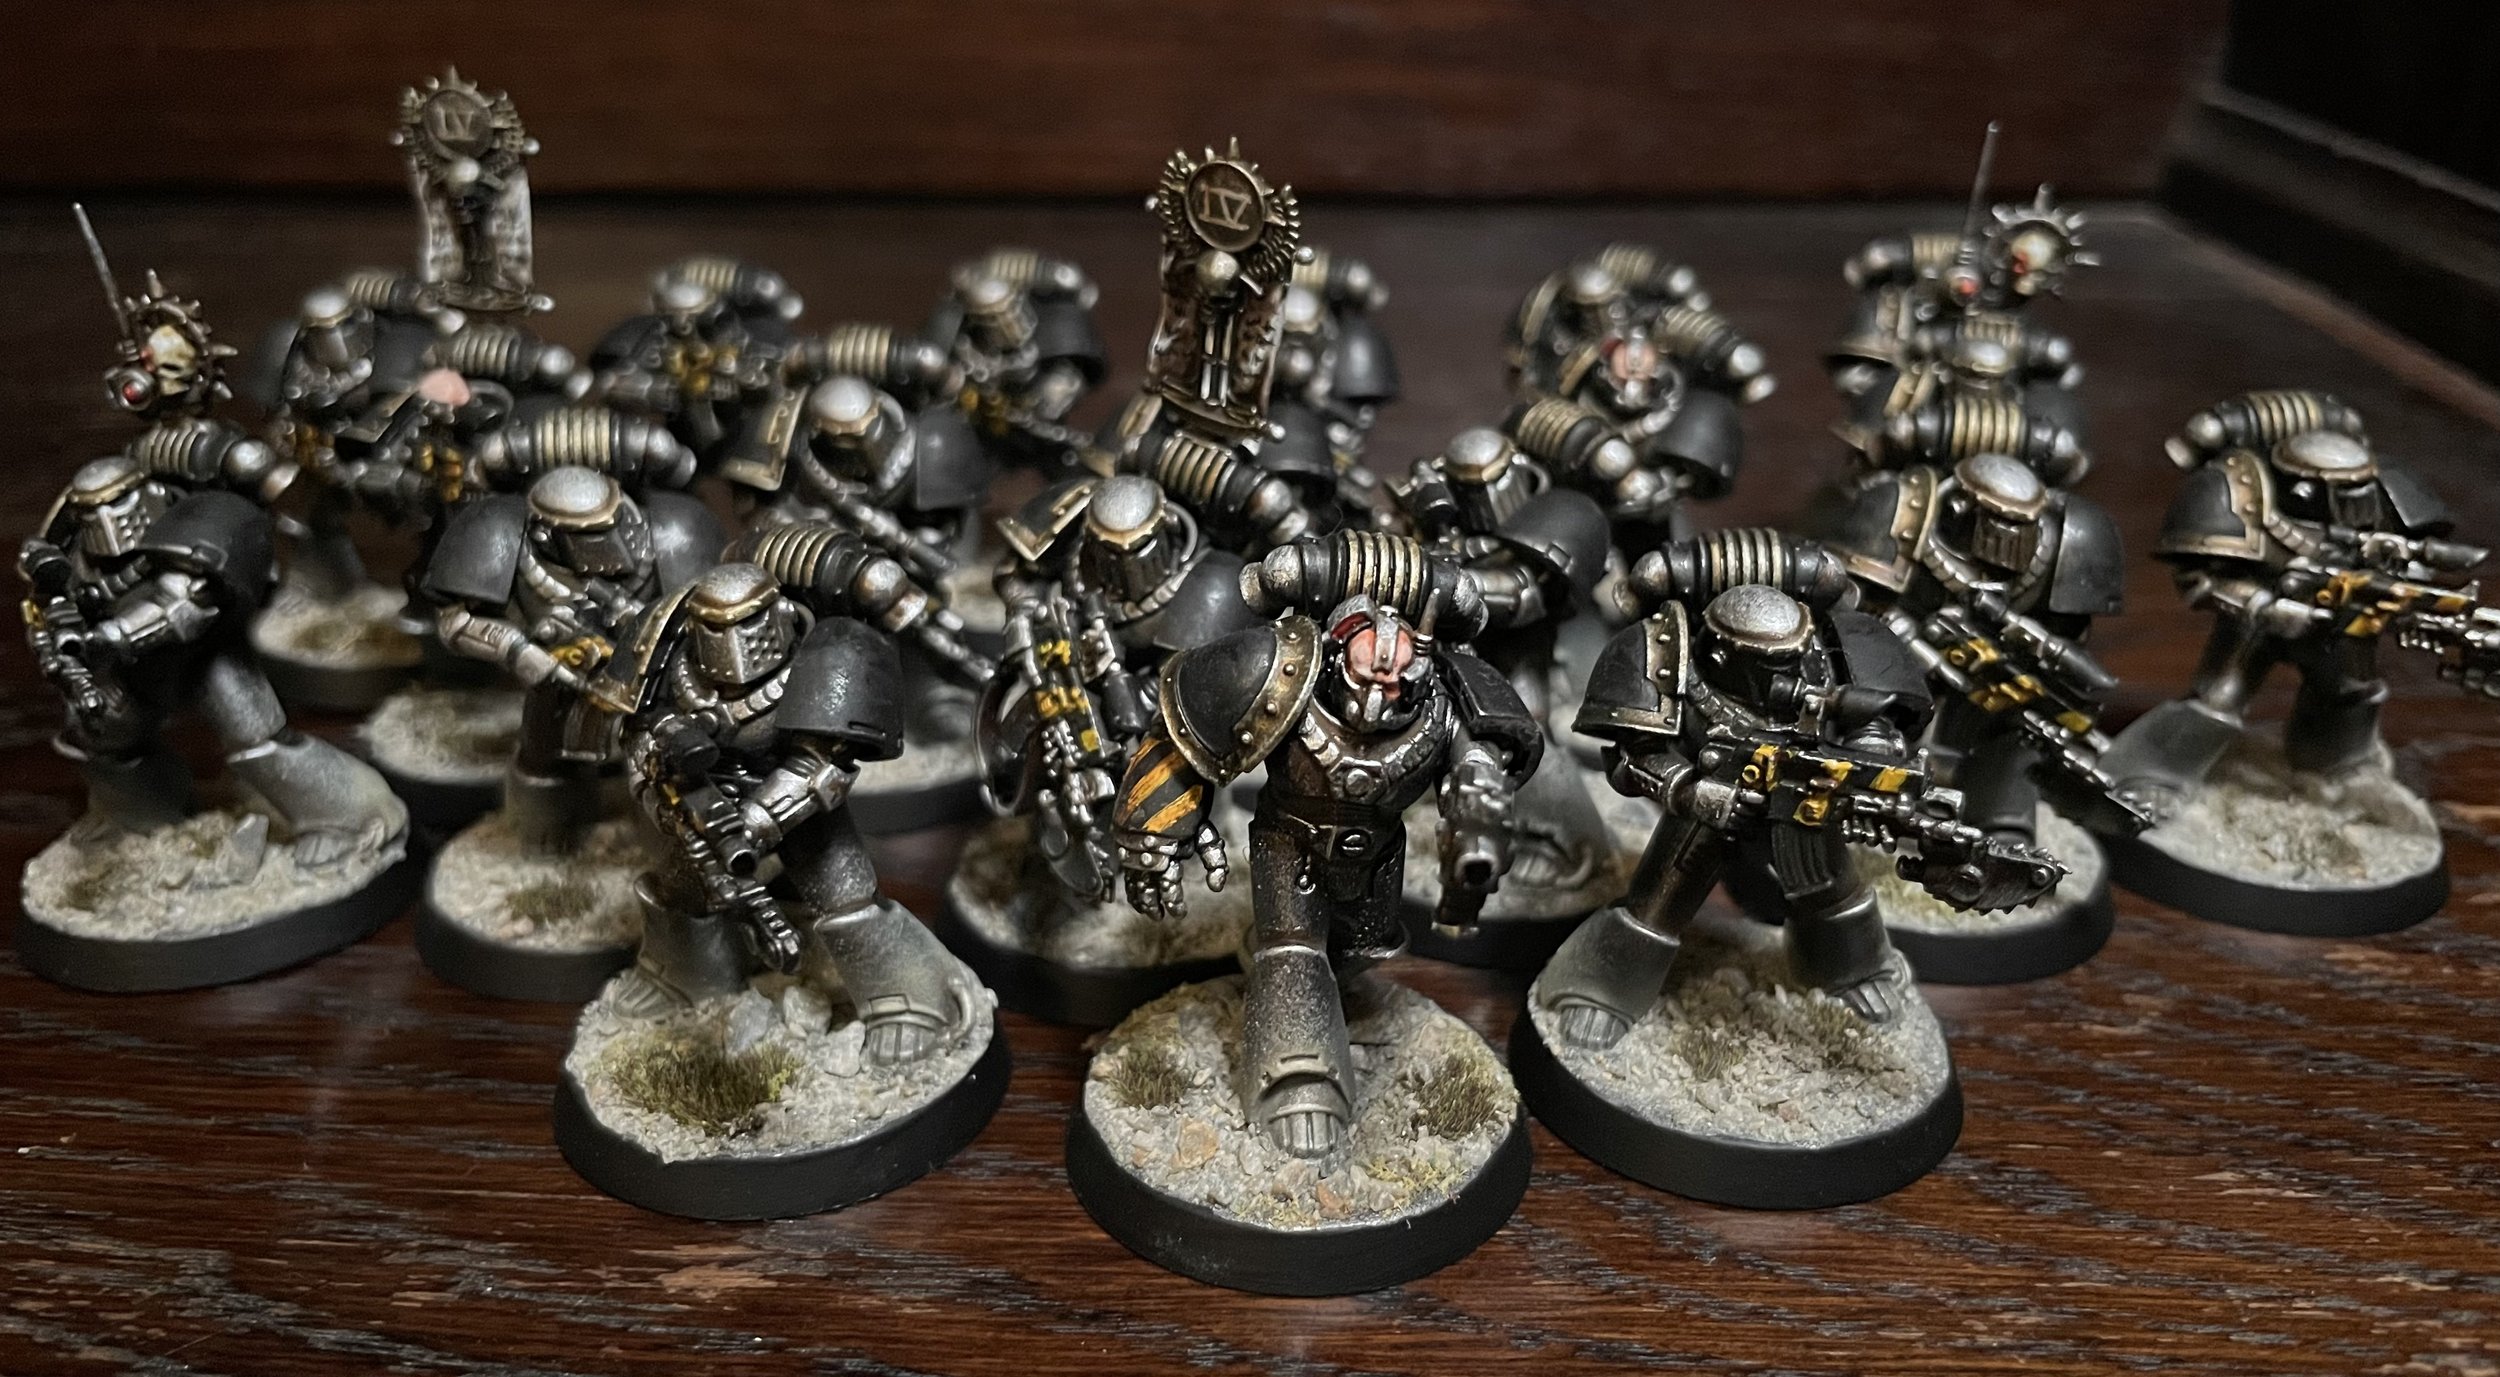


Next little update on my Seekers. Now the twenty marines have got som oil wash, oil weathering and some silver highlights.


Next up will be weathering on feet and calf’s. Then some targeting lights :) .
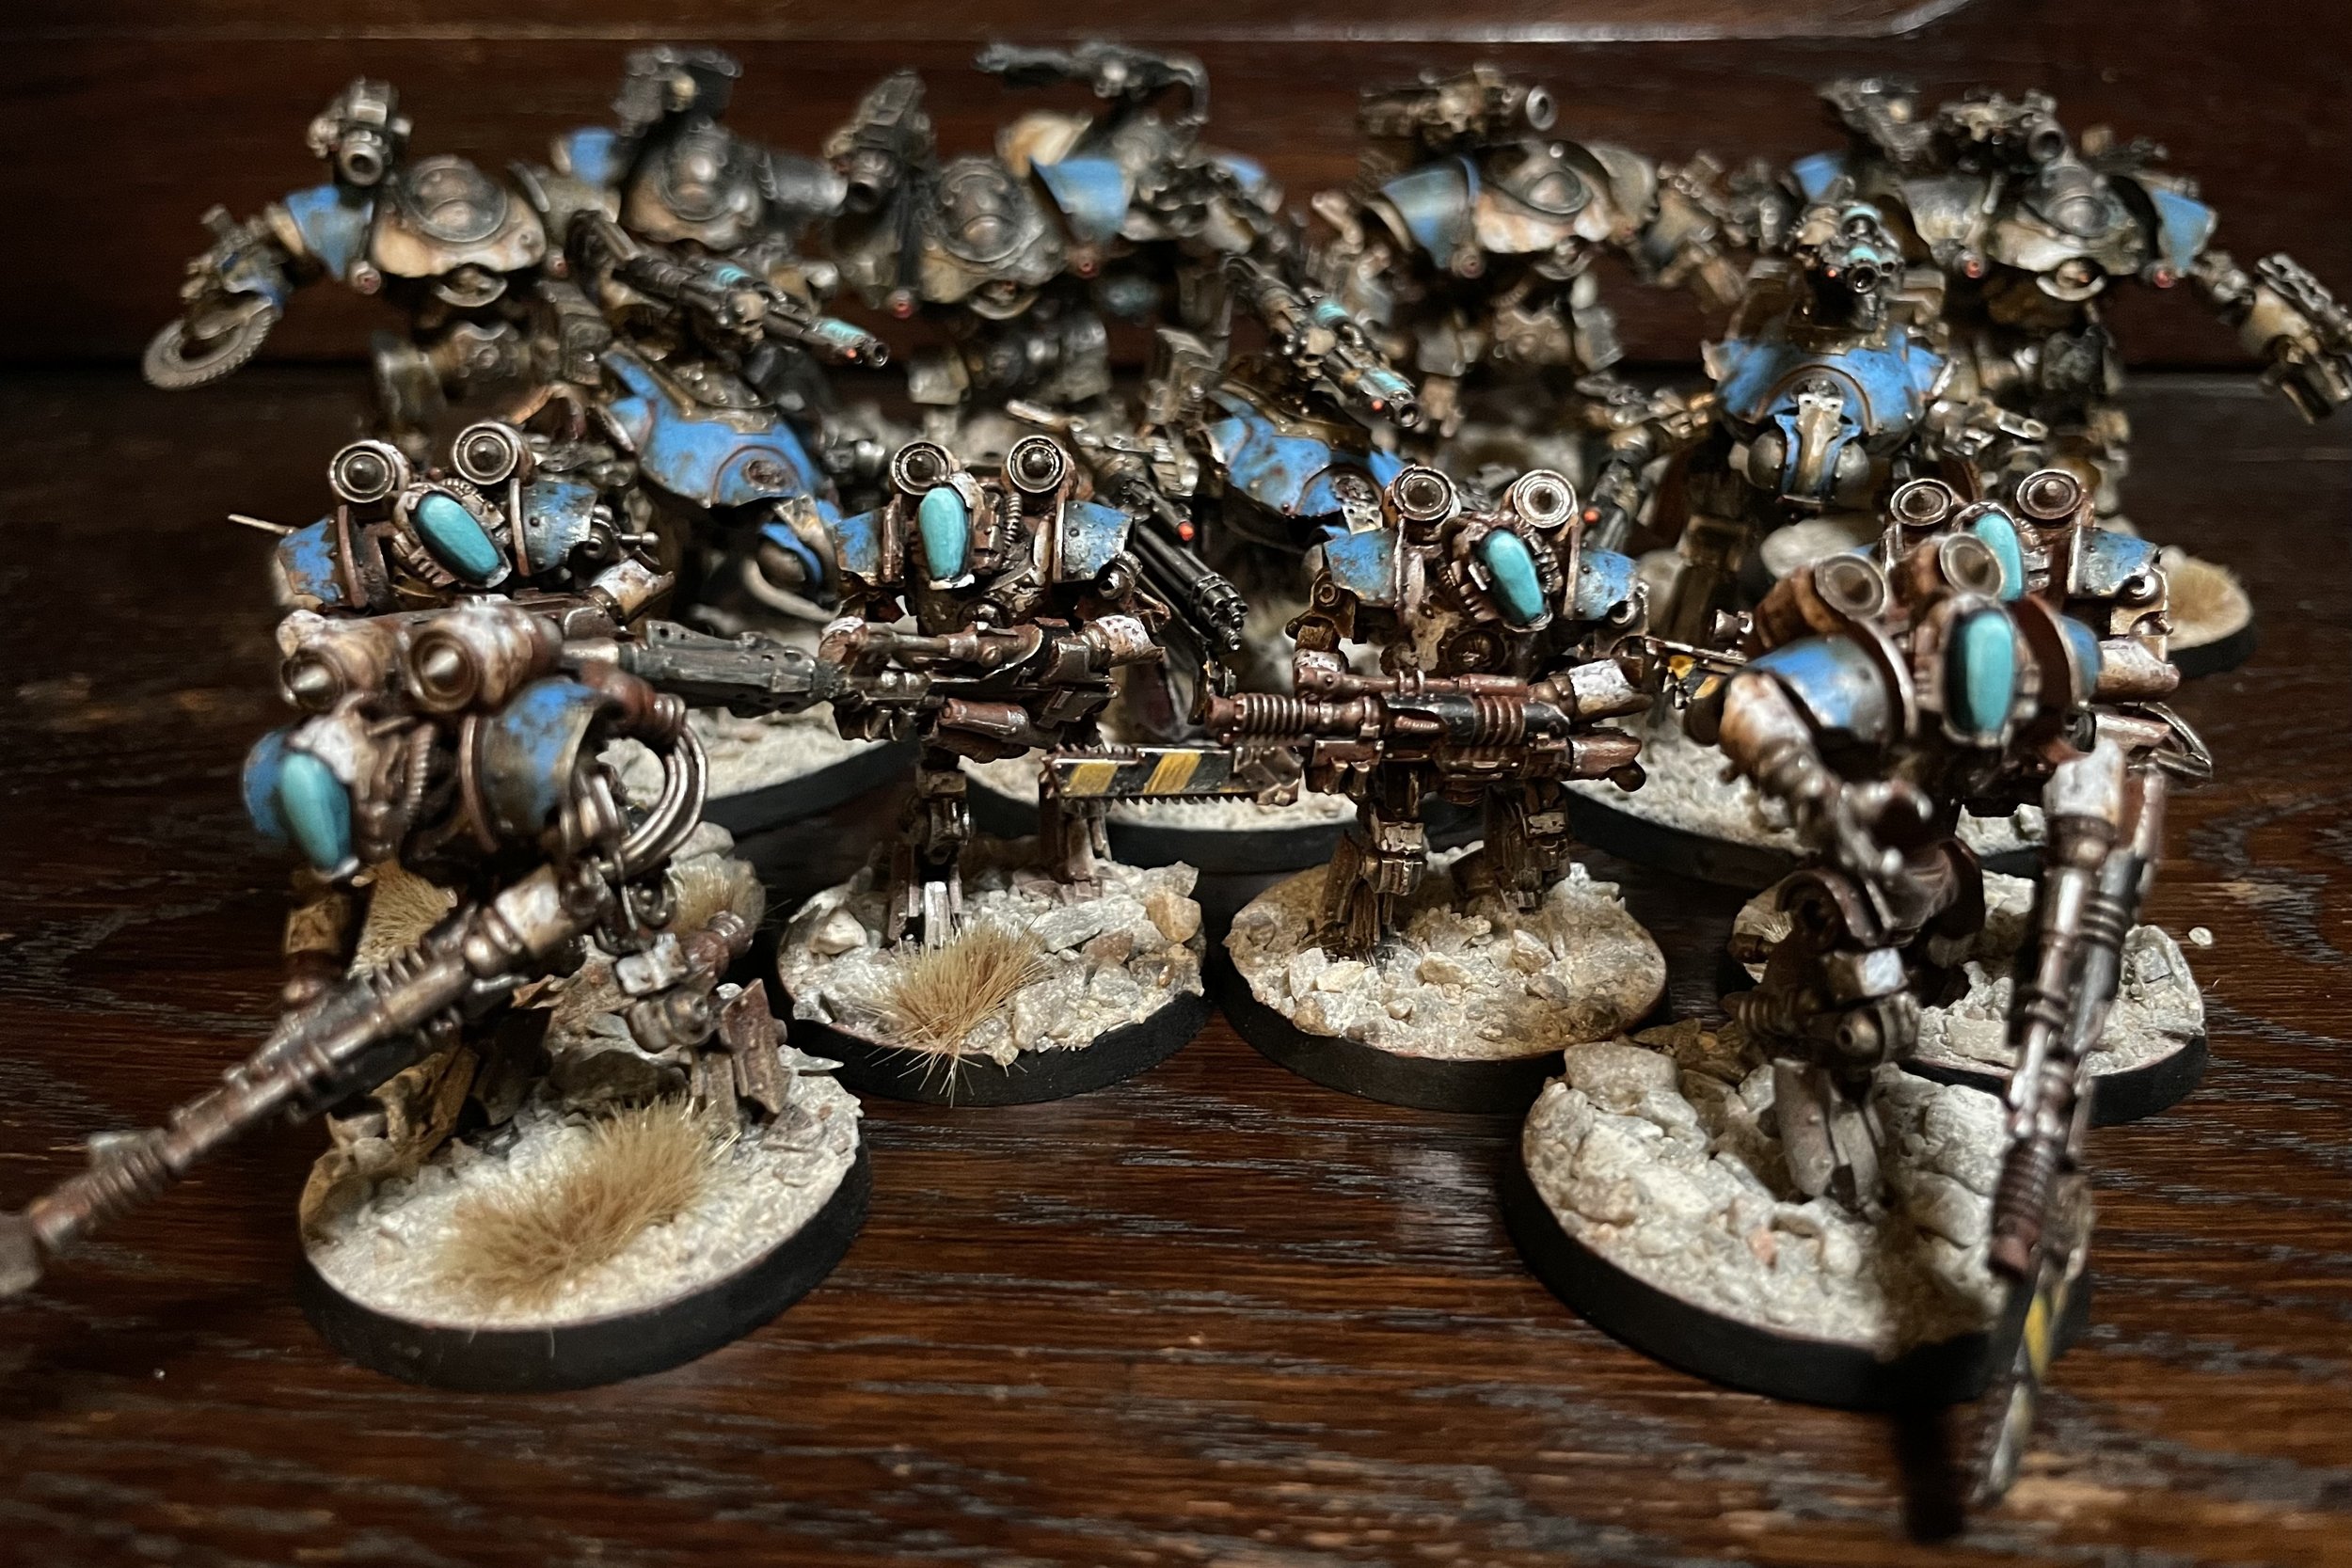
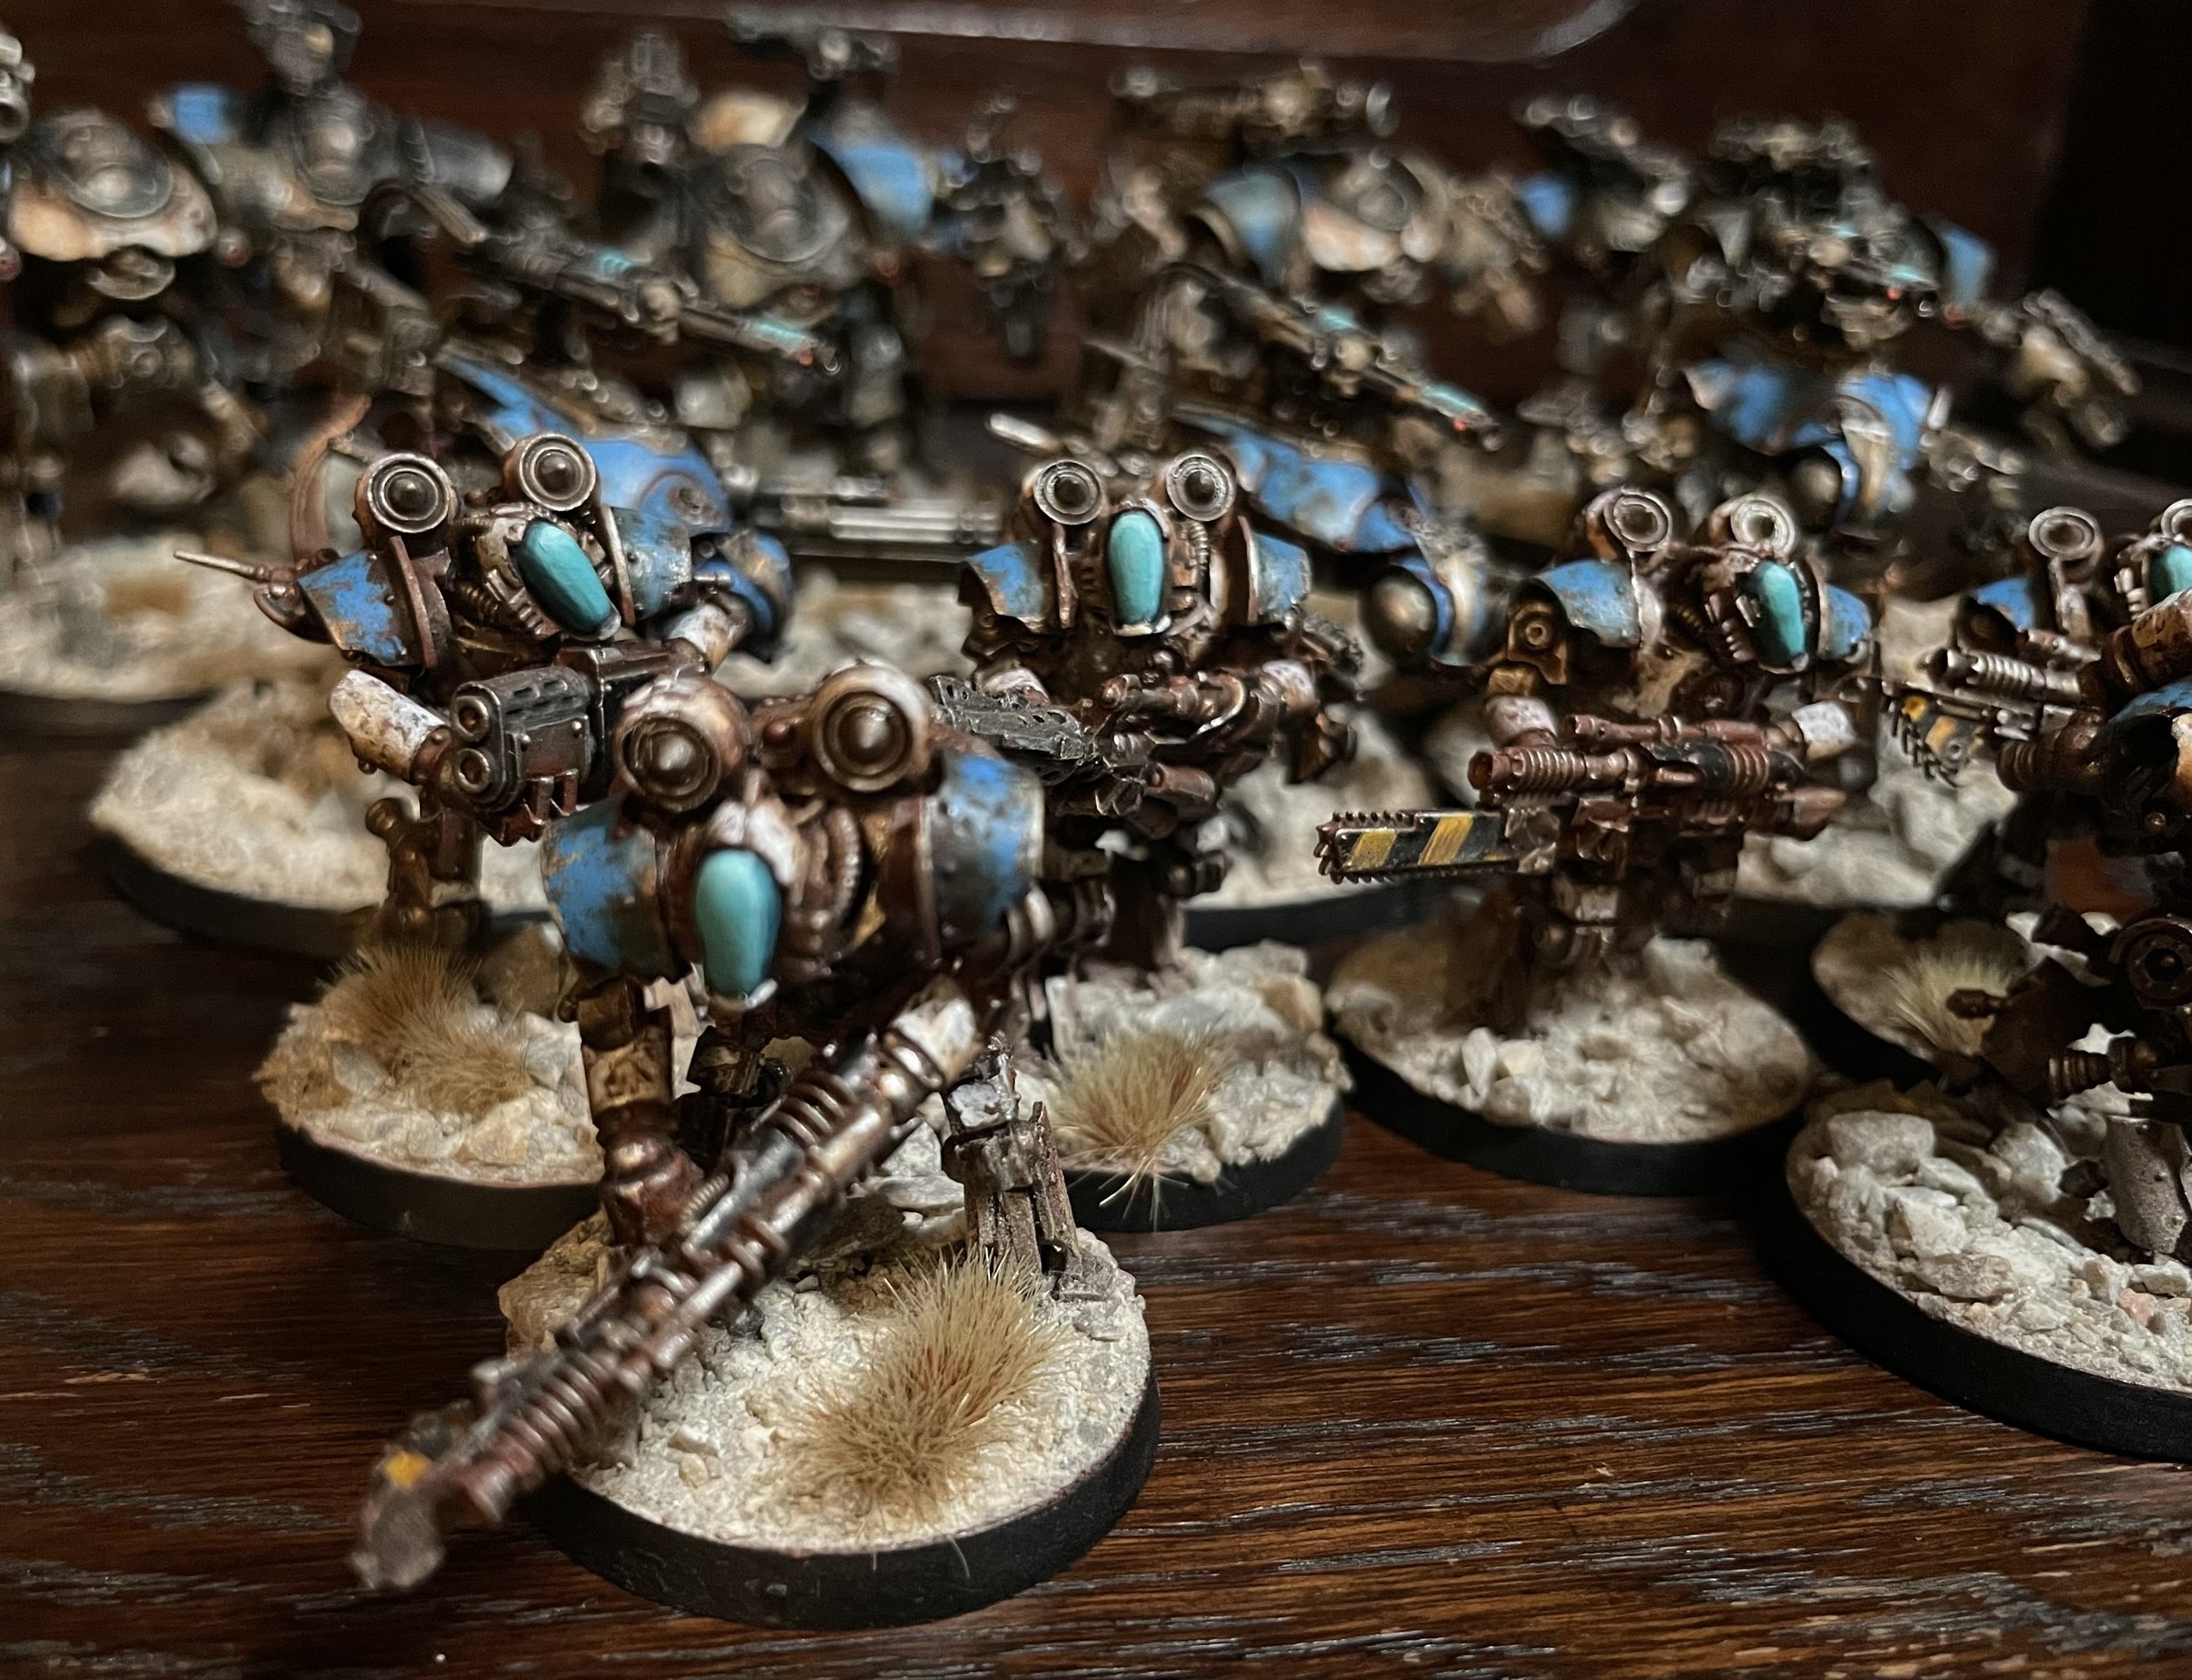
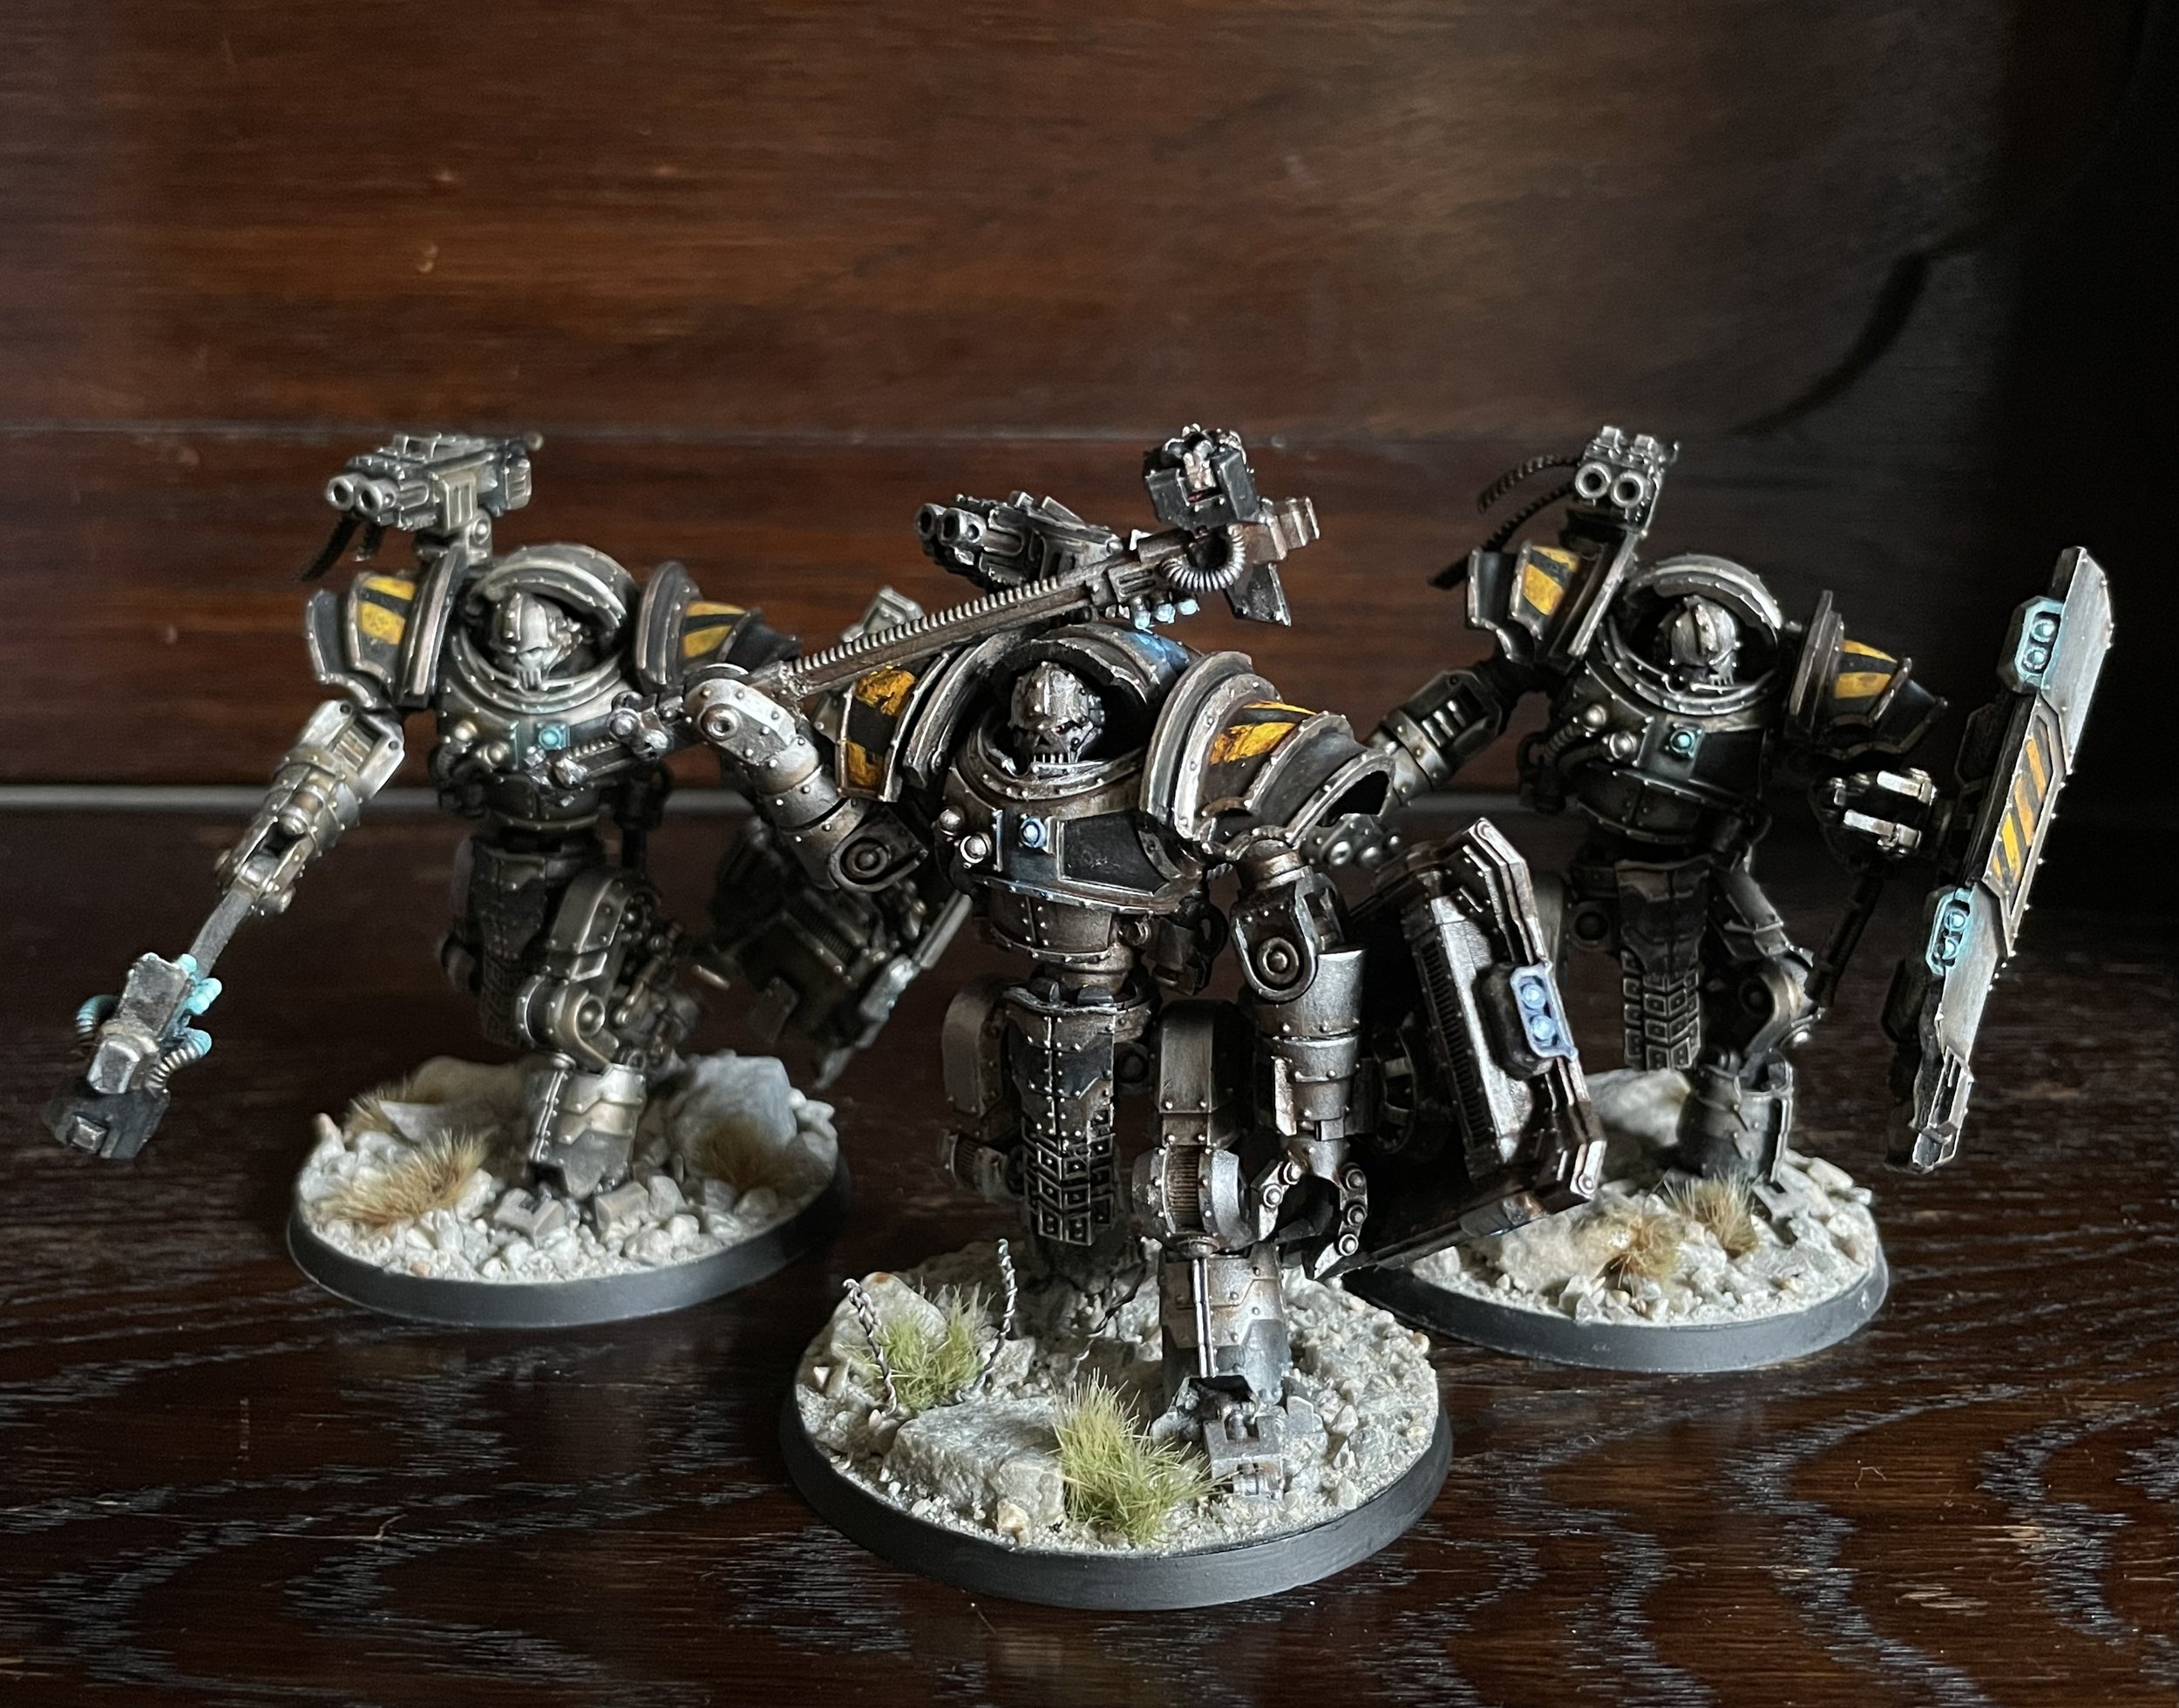
So, I was supposed to be working on my Seekers but I got sidetracked a little.
A couple of weekends ago I played my first game with the new Mechanicum book. I will not address the state of the book. But despite it’s flaws the army was quite fun to play.
The way the robot army is controlled and the fact it no longer feels like a overpowered force was very inspiring.
You need to work for your victory. The army still feels strong and have a good chance at winning if played correctly.
So with this I felt inspired to brush up my robots from mars a little. I haven’t really settled for a color scheme before but feel like I have locked it in now. Only took me 6-7 years to decide 🤣 .


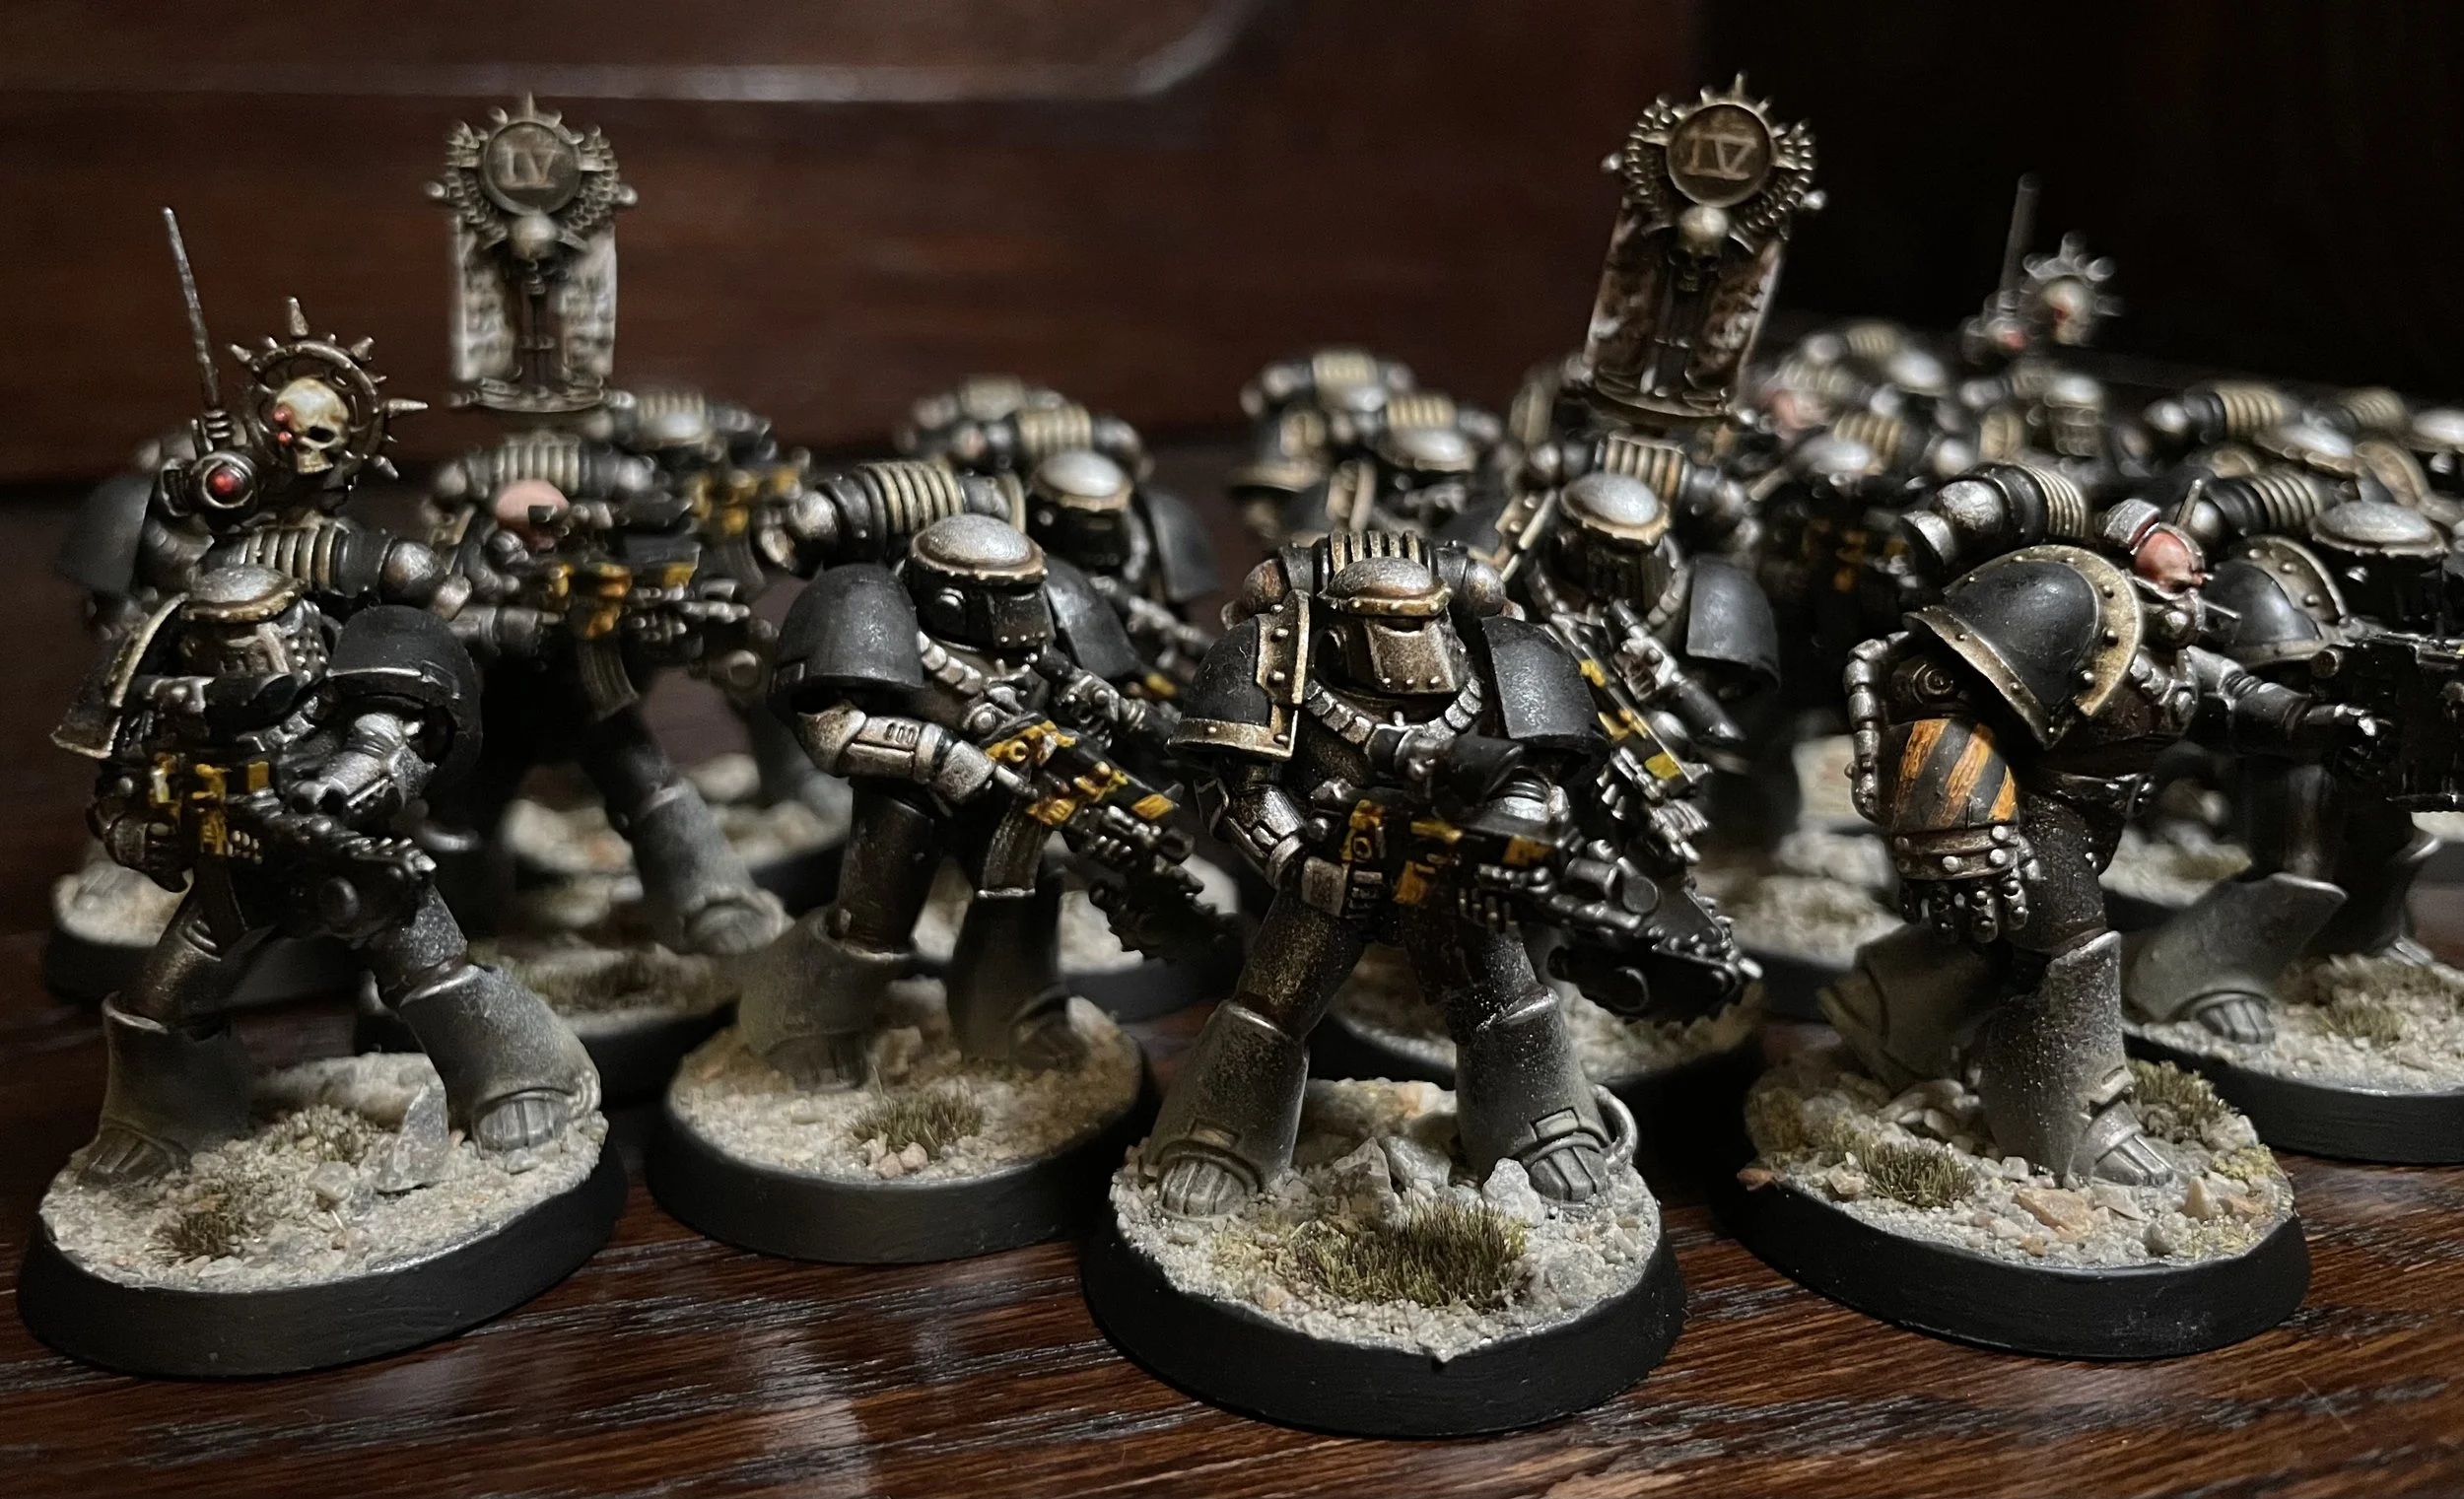
Painting 20 marines slows the speed down some, but I always feel that dividing them into fives helps. It at least helps mentally 🤣 .
The black areas have now been painted and hazard stripes is added. And that marks the most “complicated” part of this paint job.
I decided to do the hazard stripes on the guns. This is the old school way of doing it….at least that was the way it was done back in the 90s . Plus doing hazard stripes on the shoulder pads is really time consuming. I have done the hazard stripes on the shoulders on most of my army. Now I fell for a change and a simpler path 😅.

A small update for Kuggköping. Some smaller fixes and corrections. The special mission confrontation, aggressive enemy behaviour, and some abilities have been tweaked a little.
Check it out and give the game a try.
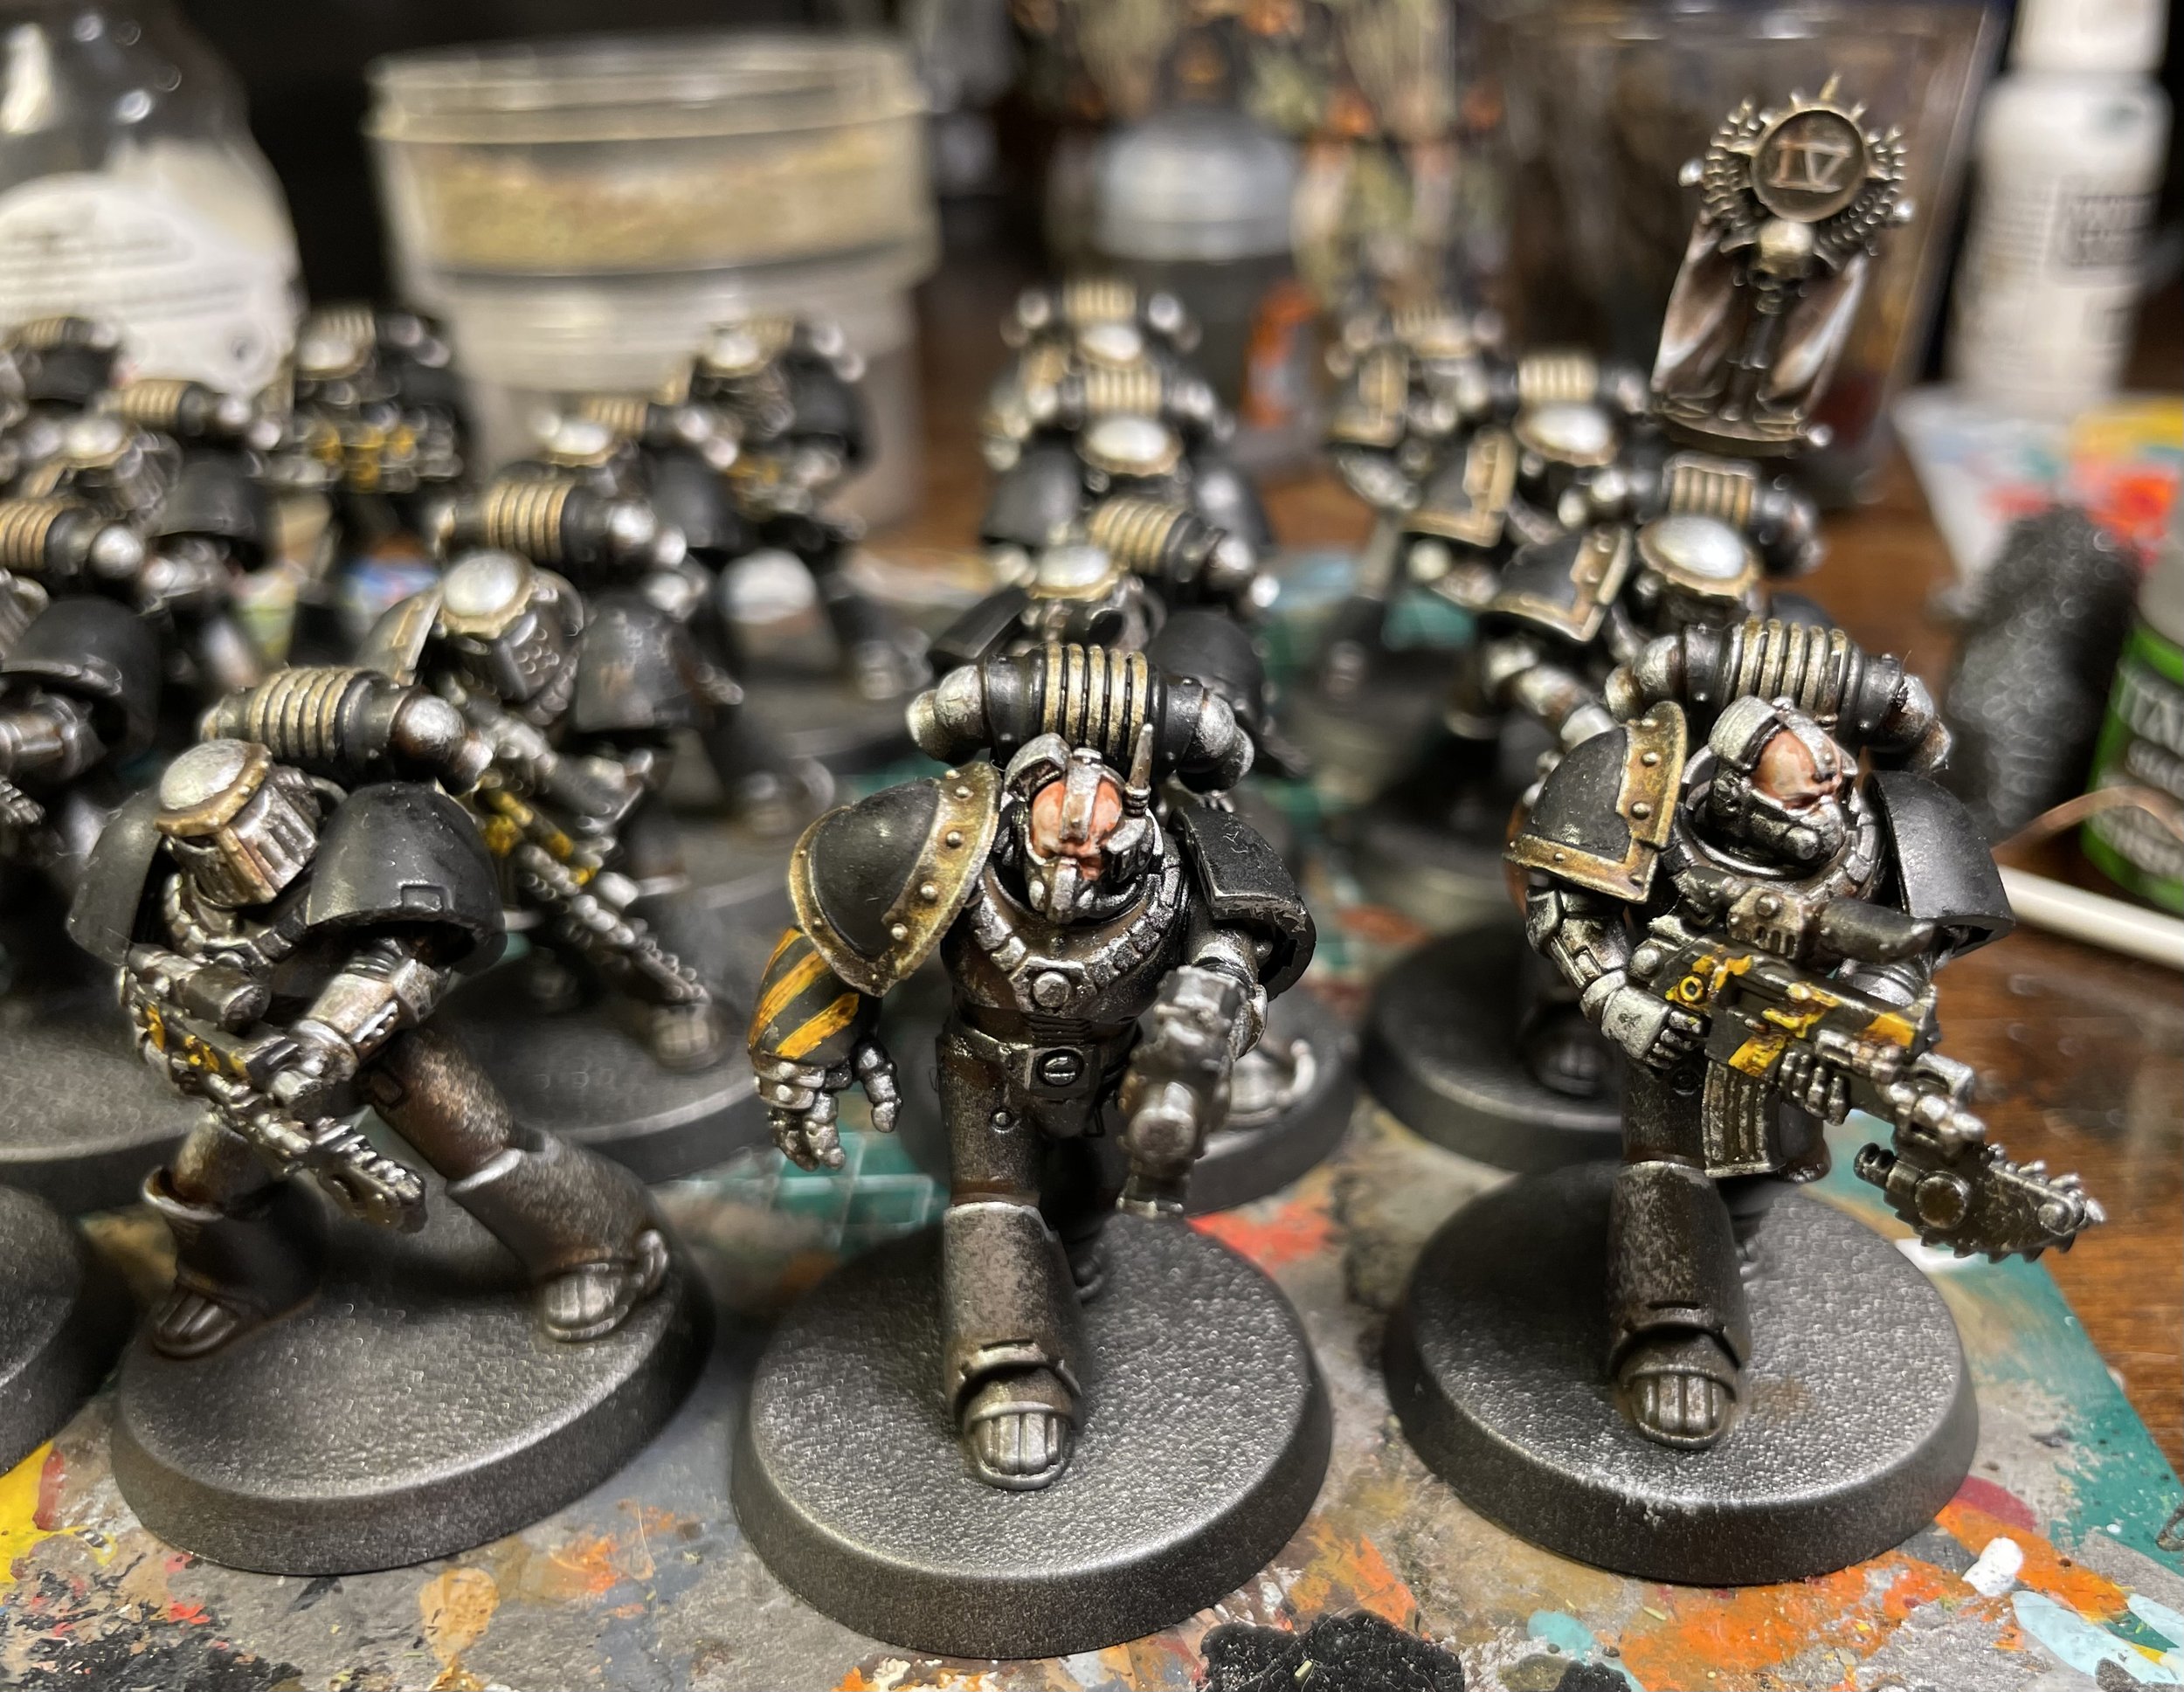
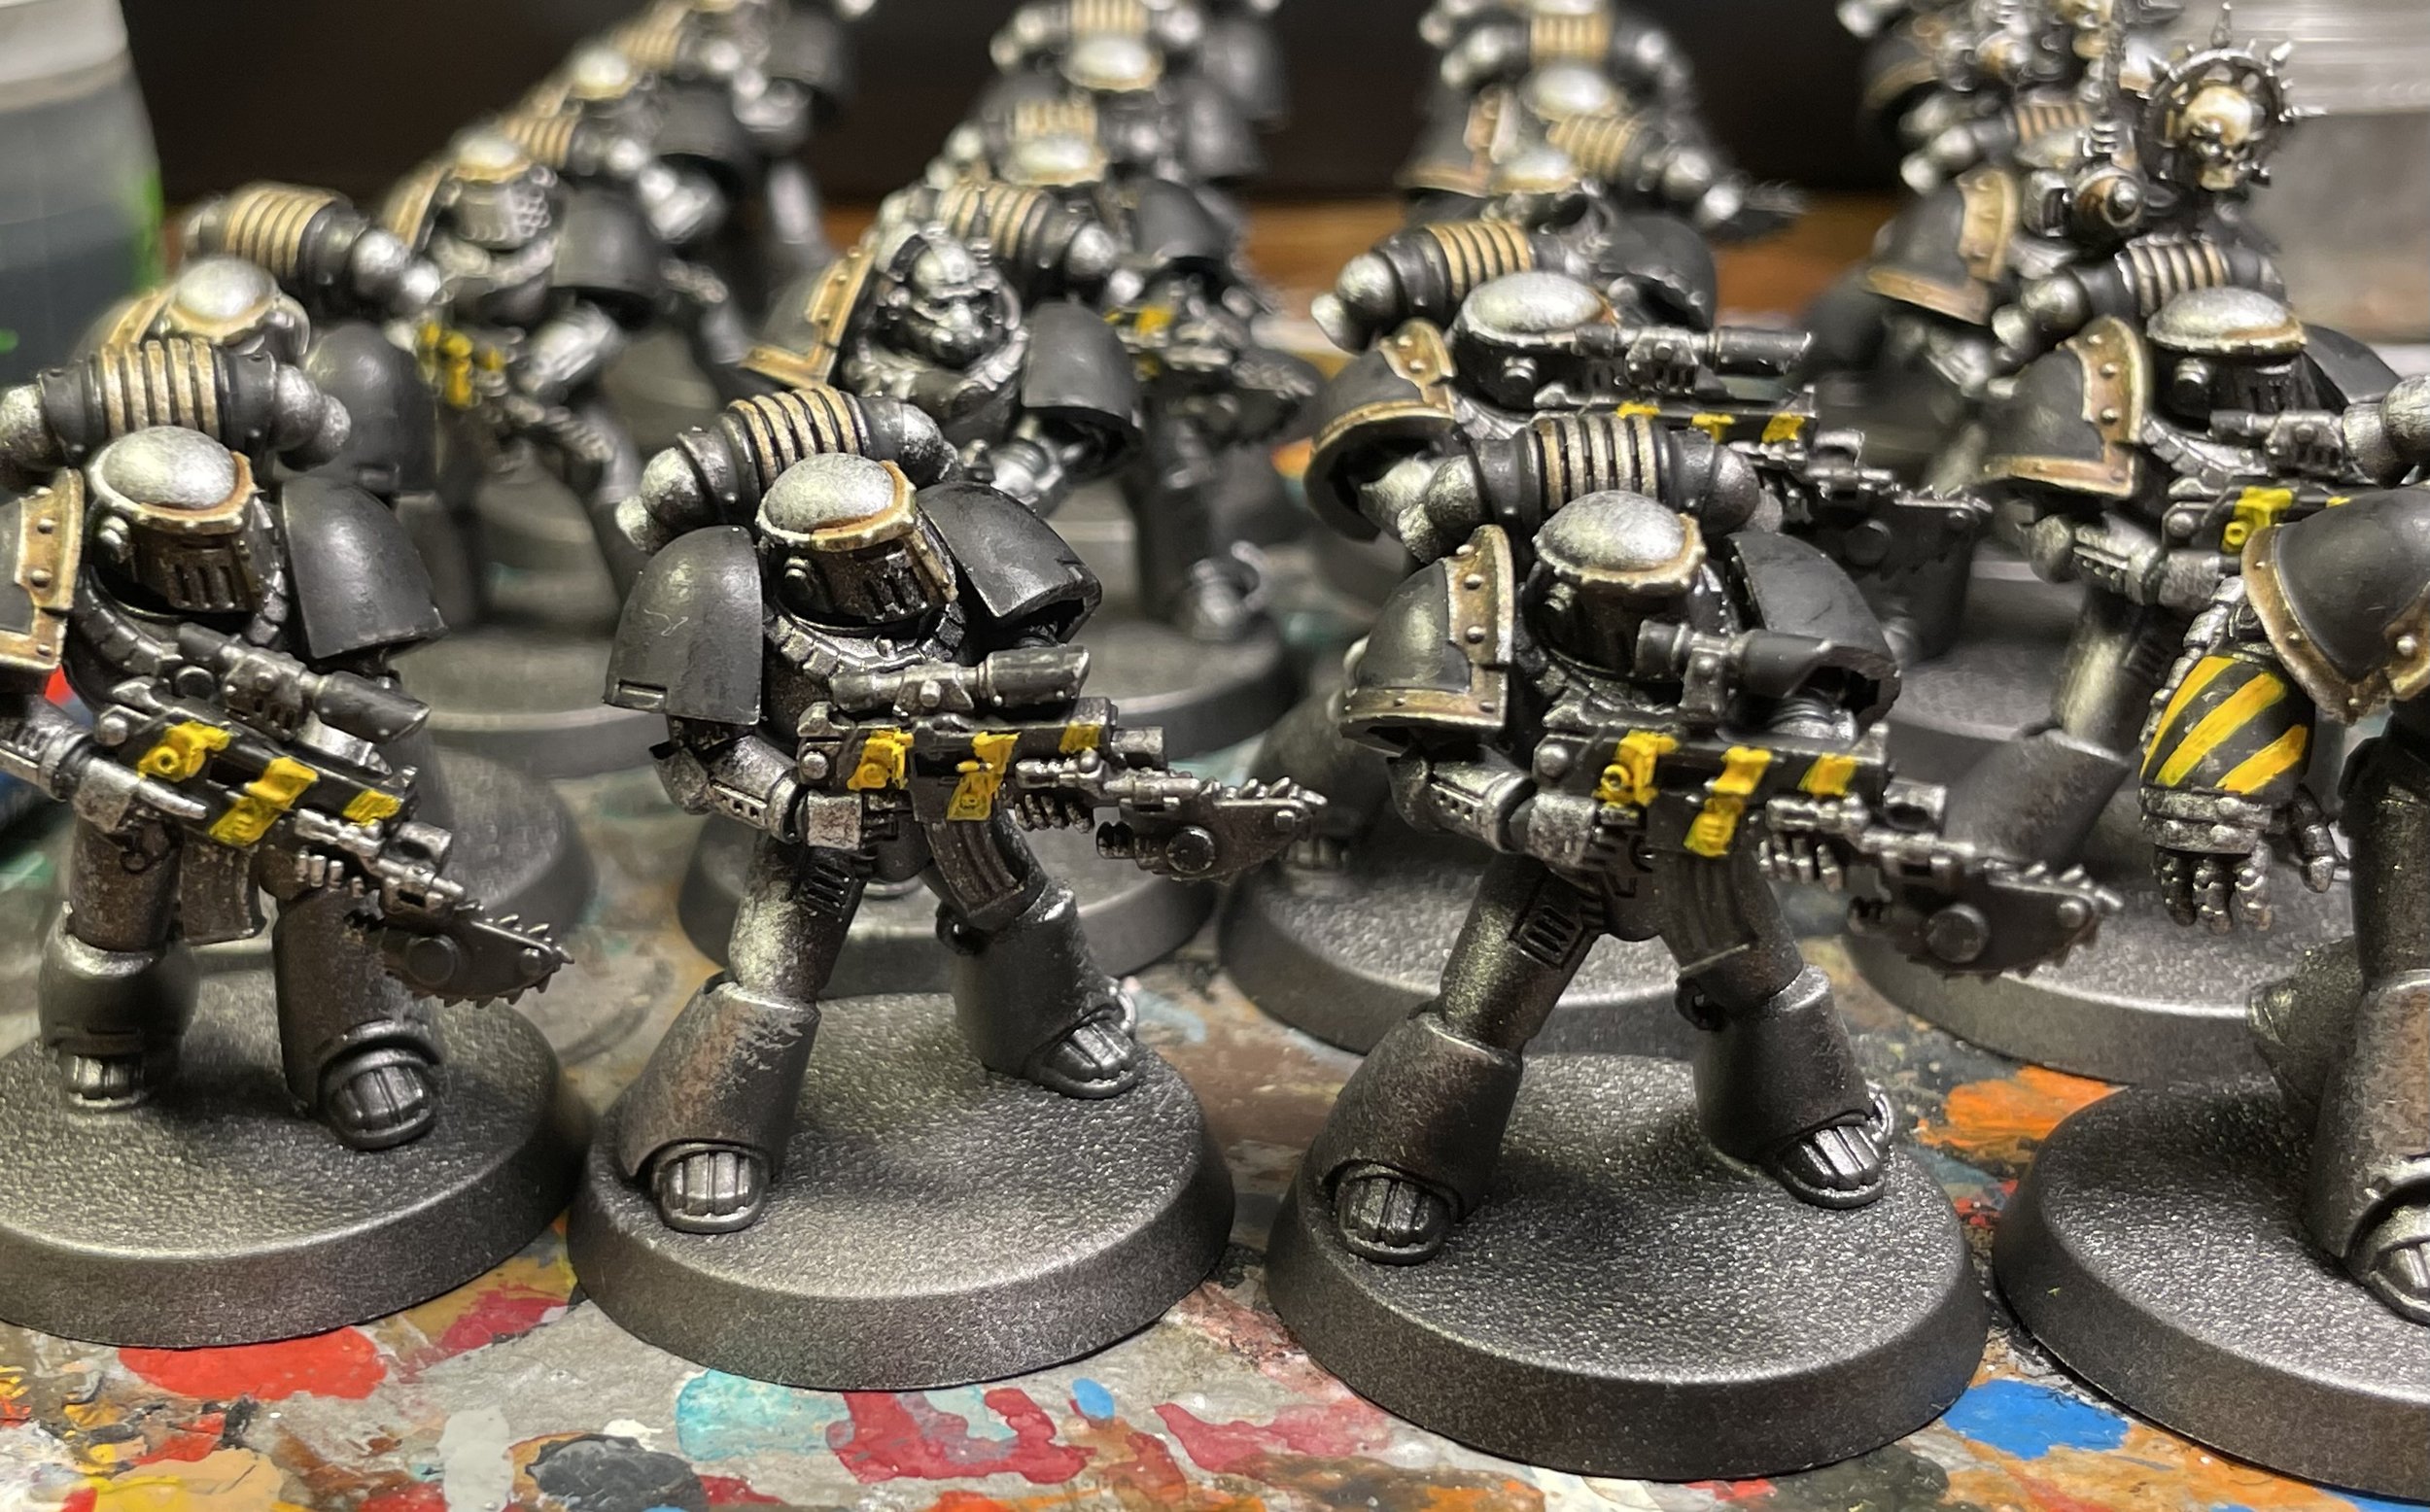
Picking up where I left off my seekers.
After black primer and Leadbelcher zenith spray. I sponge brighter silver on the top surfaces on the armor. This to give more of a surface highlight and to introduce some textures.


After this I use a contrast paint called skeletonhord on all trim and areas I want to make gold.


This is pretty much the same process I used when painting my Kratos tank. So the process is both quick and simple.
I have had this model for some time but never got around painting it up, Until now.
It is a rescue model that was in a pretty bad shape when I got it. I think I managed to make it better but it still have some issues.
But I feel it is fine :) .


This took longer than what I expected. But here we are. Some reinforcements for my Word Berers.
First we have a Plasma Support Squad, with warp plasma of course.


Then we have a melta support squad.


Finally we have a Legion Pathfinder.


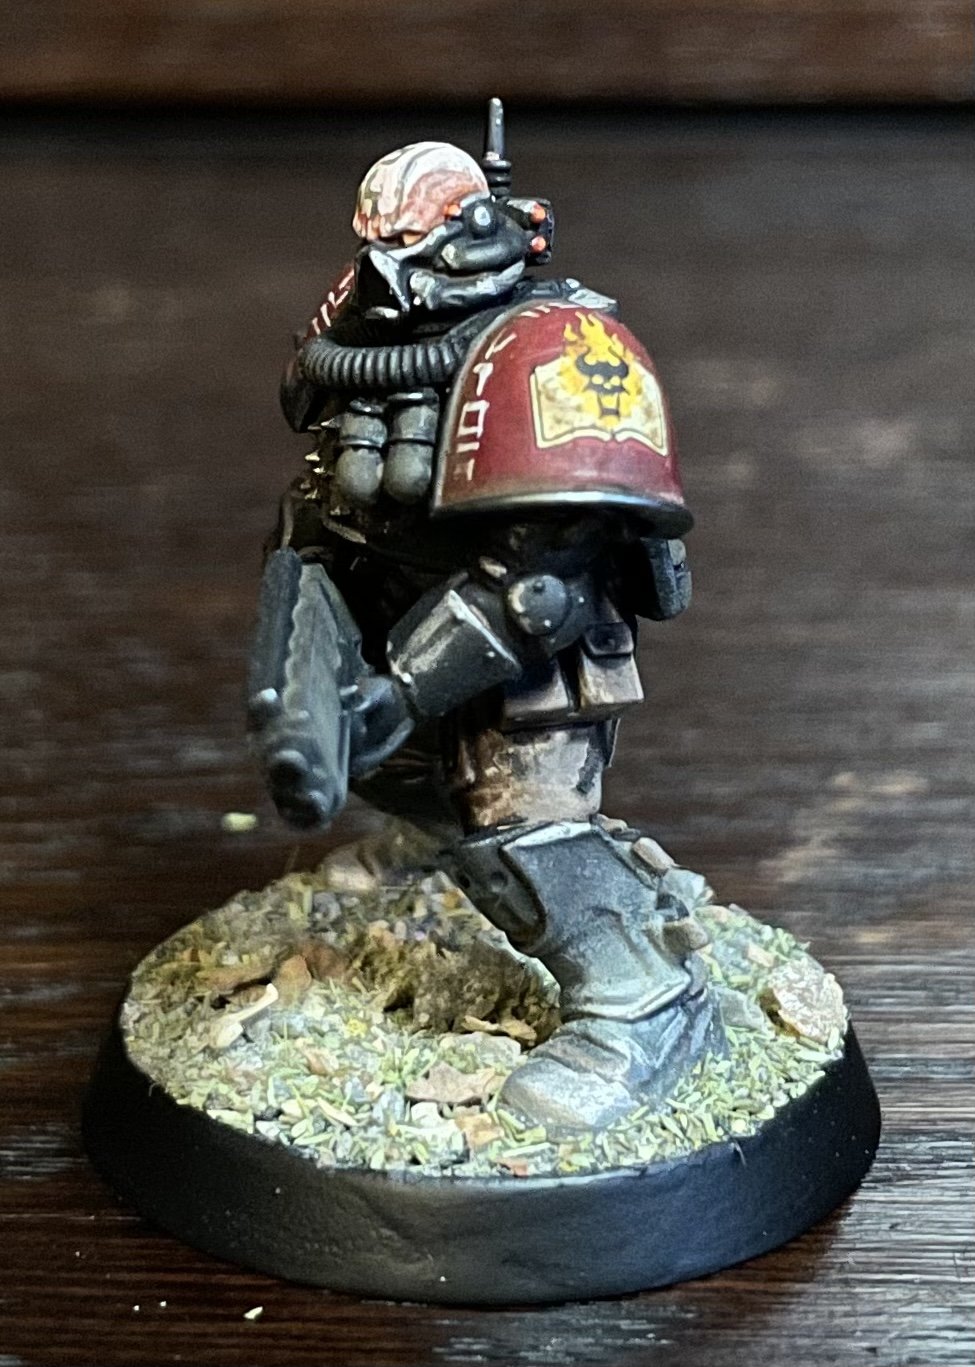
Going to be fun testing these units out on the gaming table. Hopefully I can get a game in soon.


Time for a new update of Kuggköping!
So, over the summer I have been working quite extensively with the game. Core rules is more or less, unchanged but I have been adding expansions!
Over the development of Kuggköping I have been adding quite a few different additions to the game. I realize that the more I add the more complex the game becomes, and it might be overwhelming at first glance.
So, I have been moving some additions to what I call expansions, so that it is easier to separate the core game from everything else.
Kuggköping now have 3 expansions that will add to the core game if a player feels so bold 😊.
The army game expansion introduces small army games allowing the player to create small armies consisting of units and a leader. It also adds the opportunity to play, 2player games.
The special mission expansion gives a player the option to play pick up games. These missions are designed to be easier to set up and is not connected to the core campaign.
And finally, we have the Kuggköping 1993 expansion. What happens to Kuggköping and the surrounding countryside three hundred years after the city appears? How would a sci-fi version of Kuggköping look like. Kuggköping 1993 gives an alternative theme to dress your games up with as well as a MOD system. Design character rules that better suite your aesthetic. Bring bigger models, war-machines and/or other types of models to your games of Kuggköping.
Kuggköping 1993 is something that I am realy happy with and that I am the most exited for.
Add any part of an expansion to your ordinary games of Kuggköping or add all of them, it is all up to you.
I hope that this update finds you well and that you feel curious to try this new version of Kuggköping.
So, a small update. After four weeks of vacation it is now coming to an end.
I have been doing a little of everything around the house and on my Horus Heresy legions. Mange to get a couple of games in, in the new edition as well.
The latest addition on my hobby desk is 20 seekers for my iron Warriors.
Primed black and base coated in Leadbelcher. They are now ready for the painting desk.


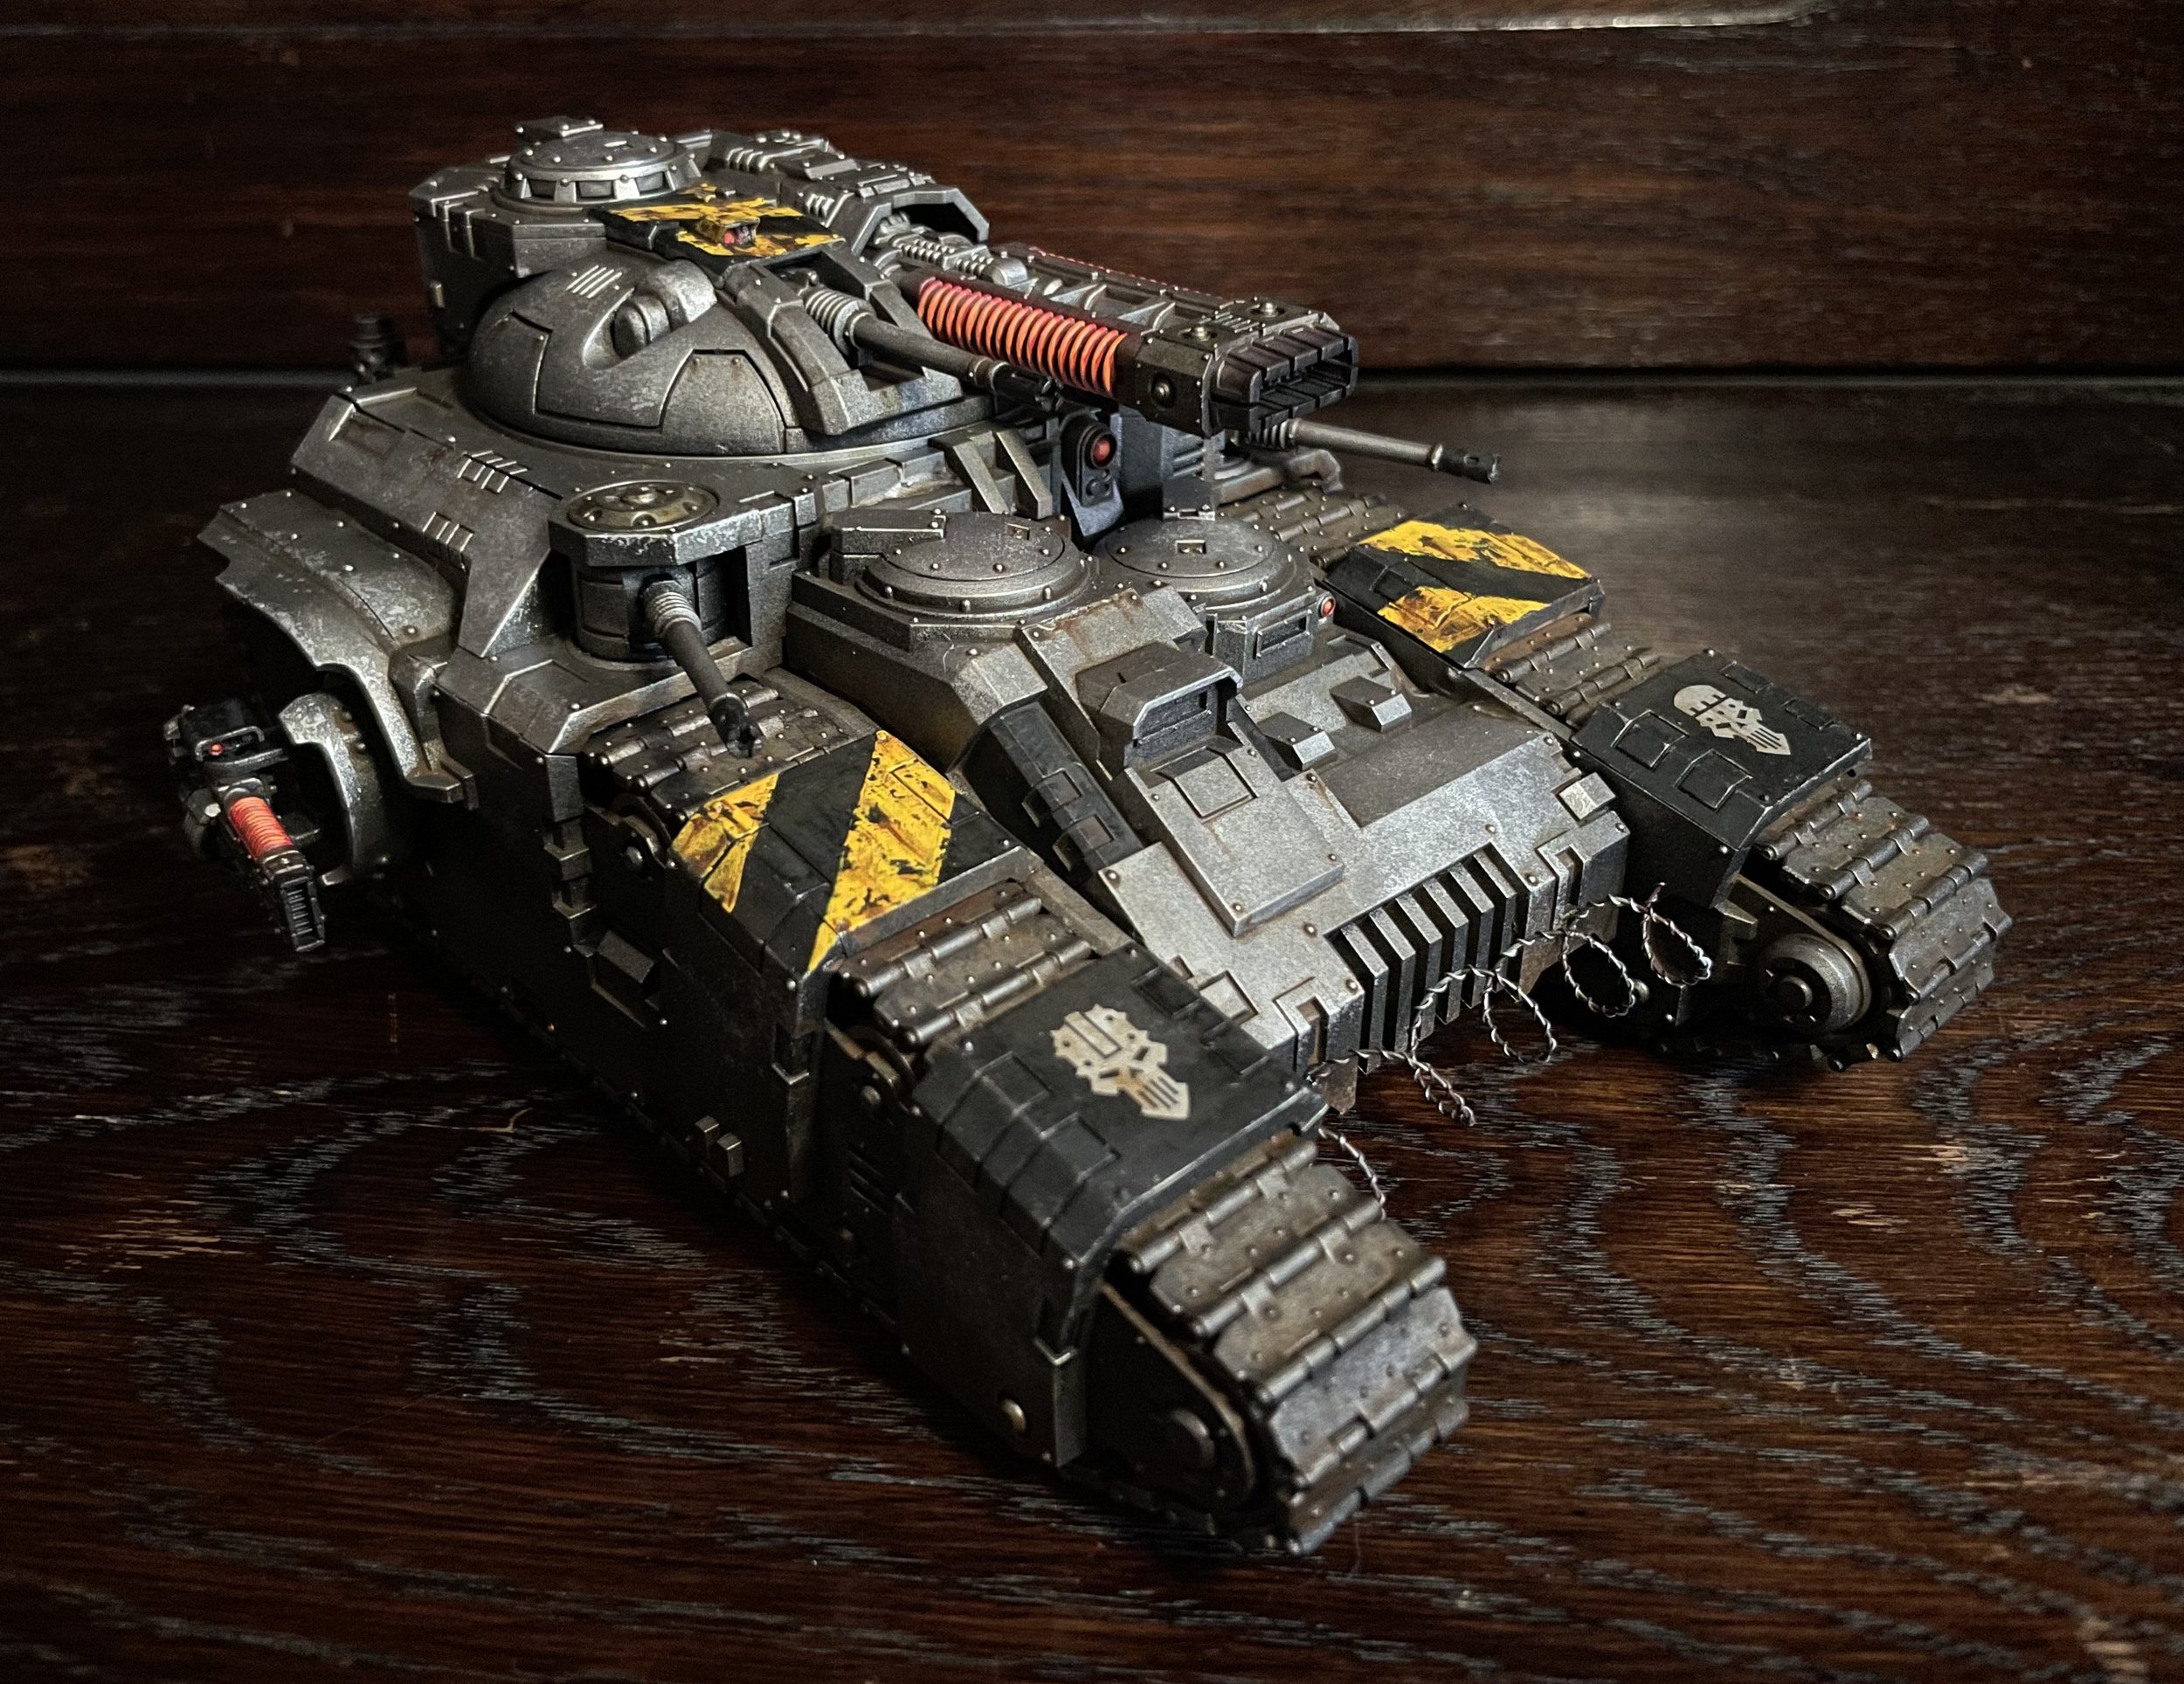
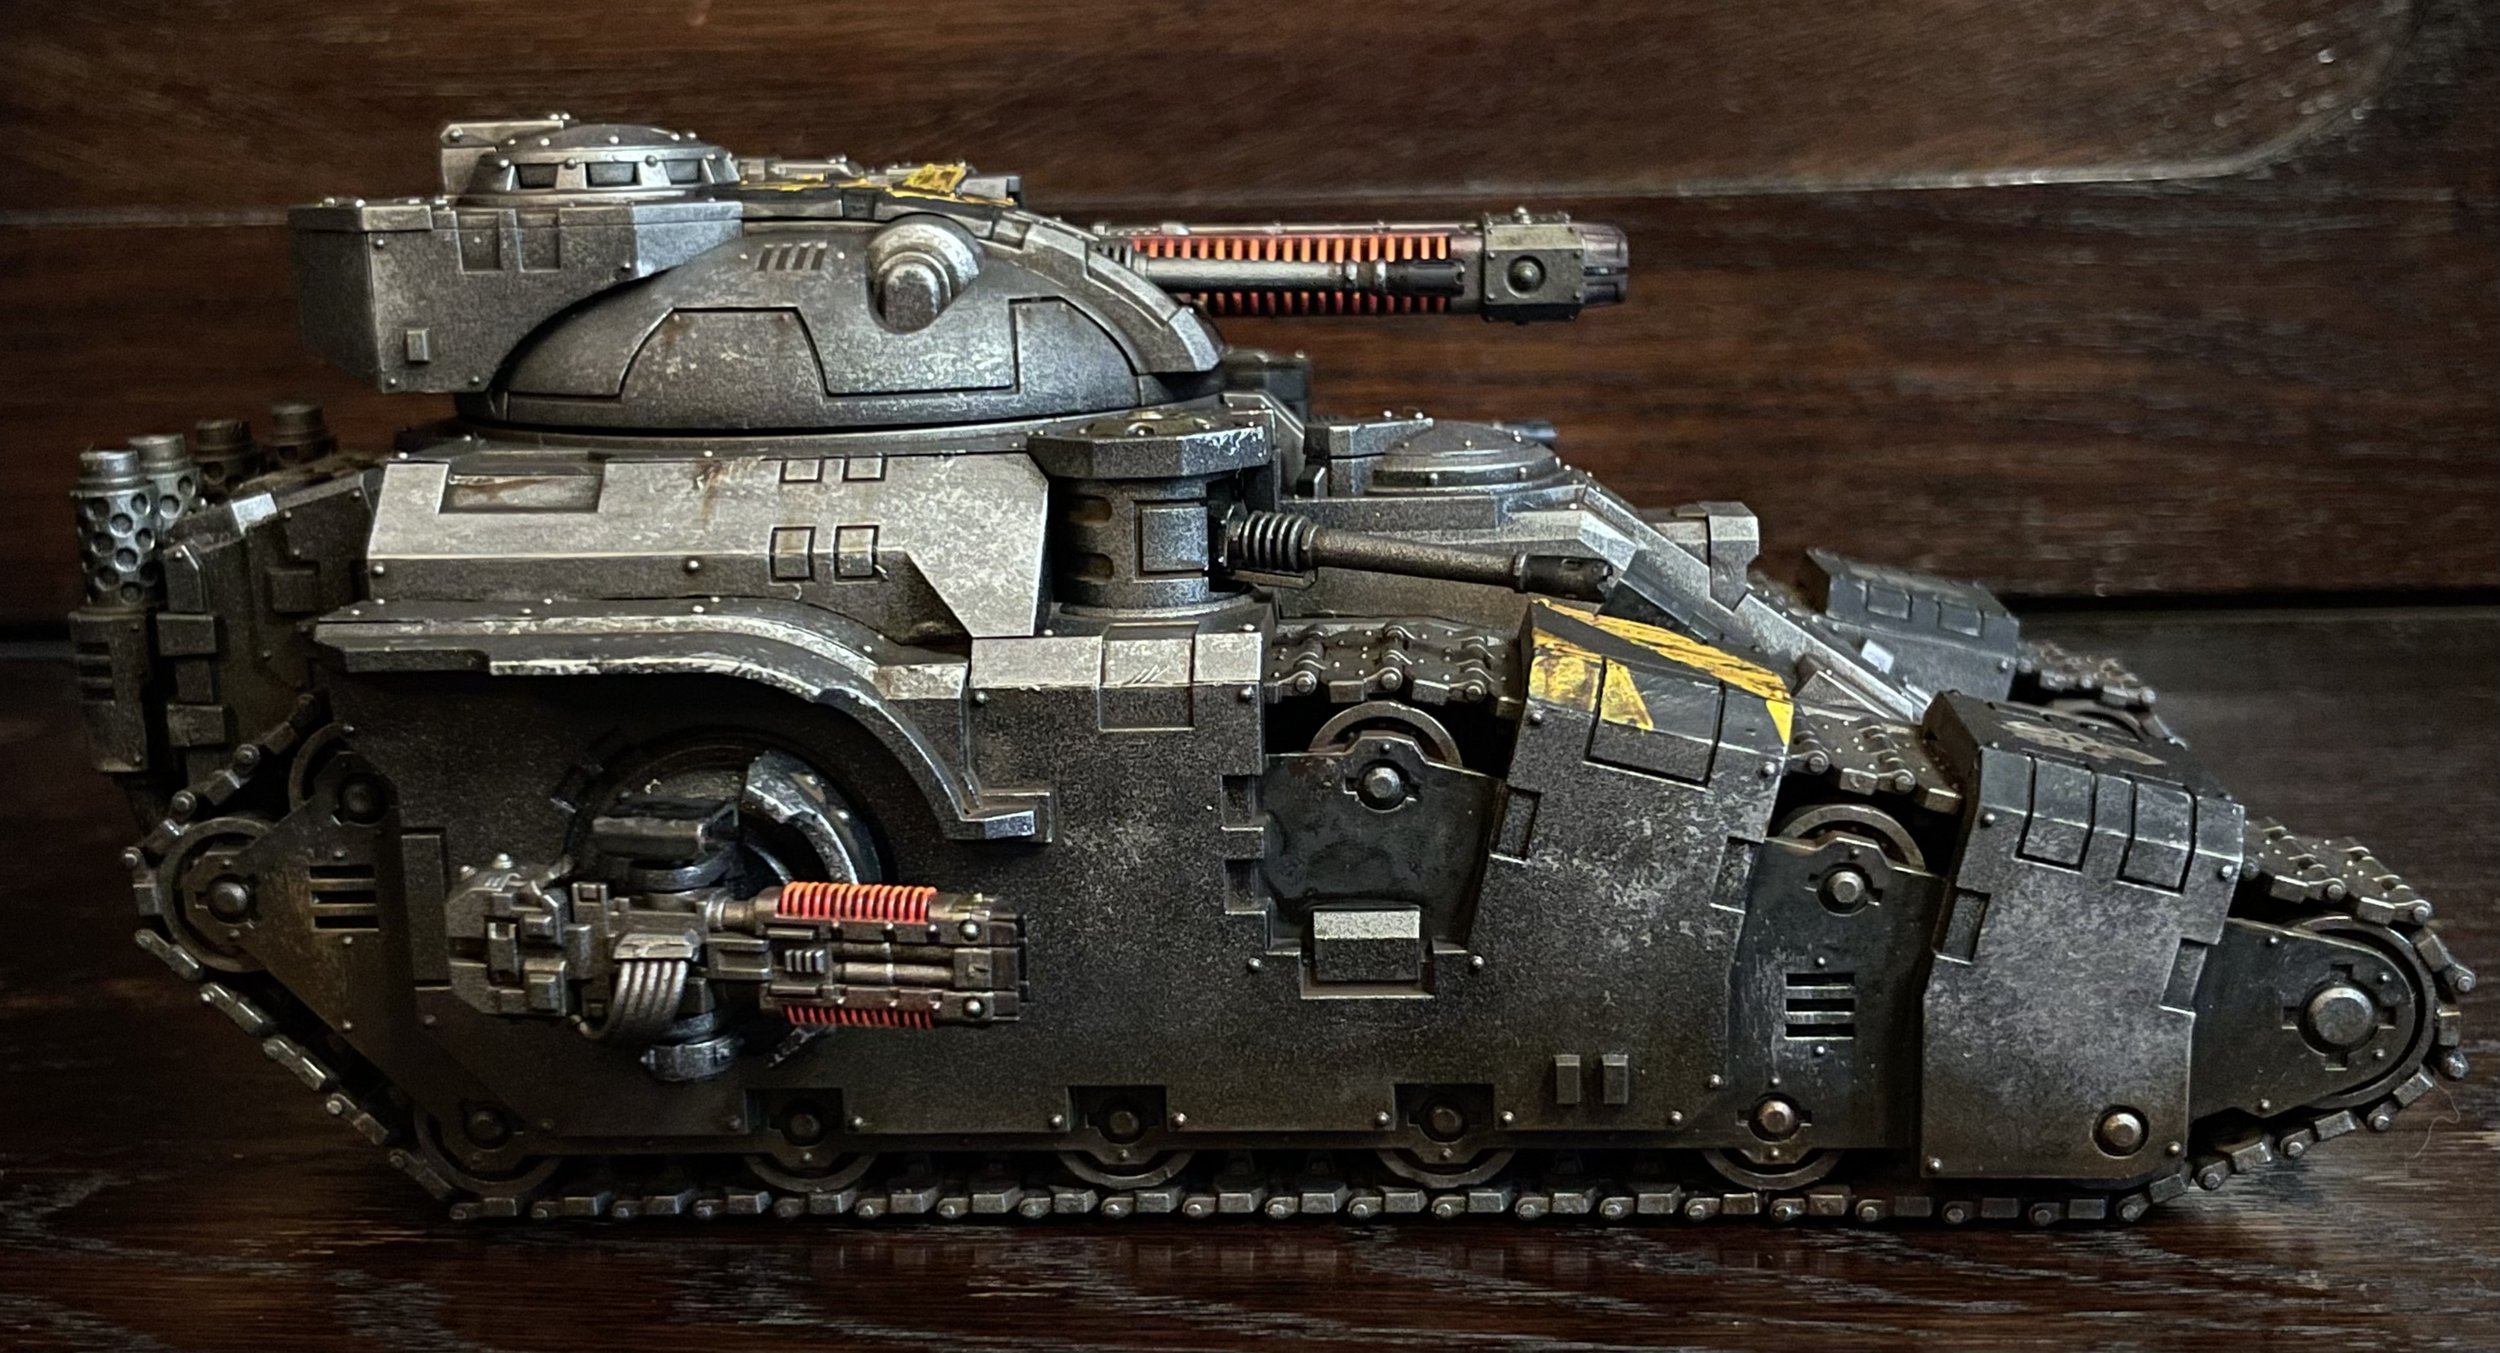
After a little hobby pause I have now finished the tank. Final step was to add some even brighter orange to the volkite coils and targeting systems. Here is the finished result 😁 .


Continuing right after part1. I ended the blogpost after I had added the transfers and hazard stripes.
Next I add scratches and battle damage to the hazard stripes with a hobby knife.
After this I mix a thin oil wash of black, burnt Umber and orange and mineral spirits. Just like I did for the tracks, but now it is all mixed to a thin and even consistency. I pin wash between all panels and in all crevices. This is super simple and easy. If I get and wash where I don’t want it, I simply use a cue tip or a paper towel to clean it up.


When the wash have dried I use oil paint to add rust streaks on the battle damage on the hazard stripes and on some other selected areas.


After this I start to add some of the glow effects from the volkite weapons. Because all of the guns can be changed, I don’t want to do OSL on the tank it self. But I do it for the lights.
I use oil paint for this. It is very easy to apply the paint, spread it out to where you want it and to remove if you added to much or in the wrong places. This process is soooo easy with oils, I can underscore this to many times. You have full control with zero risk of messing up.


Weathering the bottom of the tank is also done with oils. Simply mix your paint to the color you want. Without thinning them, paint the bottom of the tank on the color. Like this:

Take a bigger (dry) flat brush. Dab the paint upward the tank side. At the end brush the final edge of the paint upwards.

When all oils have dried I paint a brighter acrylic orange on the coils of the volkite weapons and add some heat colorization on the end of the gun nozzle.


None of the methods or tools have been hard or advance so far. If you haven’t used oils before, you might want to try them on a test model before you go crazy. But trust me, it is so easy and simple. And you will start adding more and more to your existing schemes and methods.
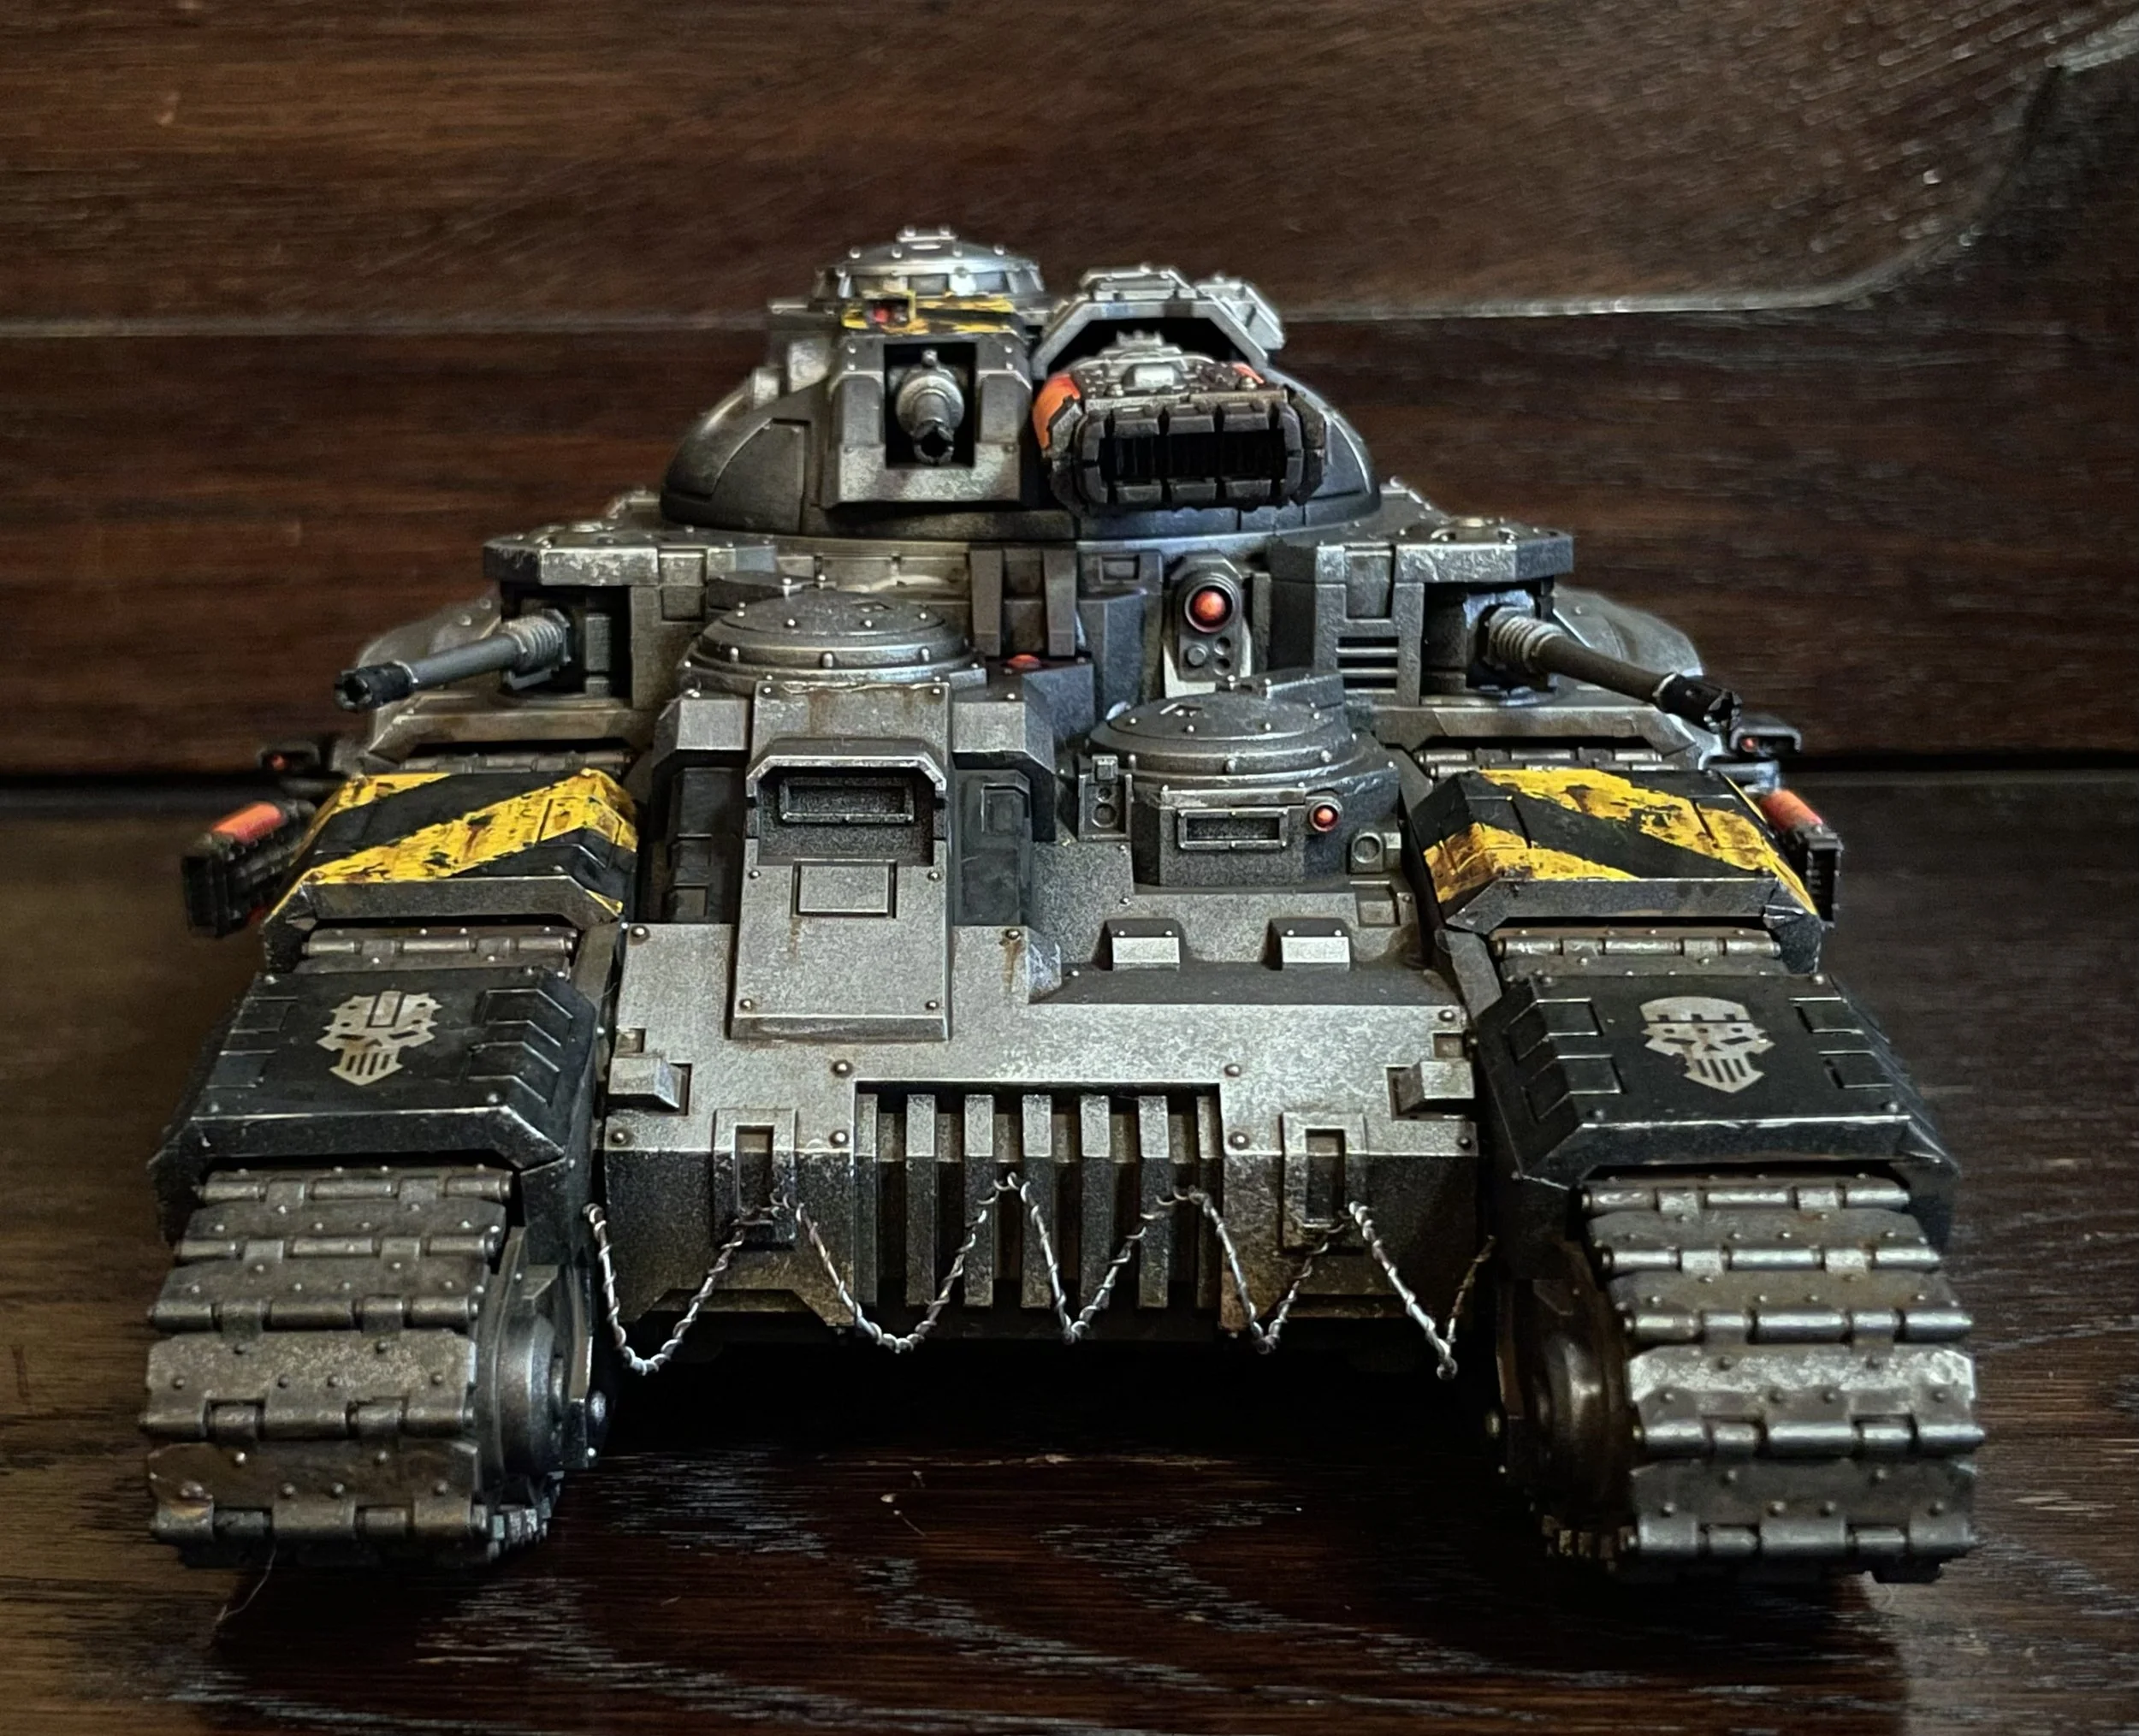
So I got a Kratos in the big Horus Heresy release. And I just now got the time to start working on all the new shiny kits. First up is the Kratos assault tank.
Over the years my Iron Warriors paint scheme have become more and more elaborate. What was once something quick and easy to paint up have slowly become a long process.
With this new edition my intention is to get back into a easier process. Hopefully adopting the best of my explorations.


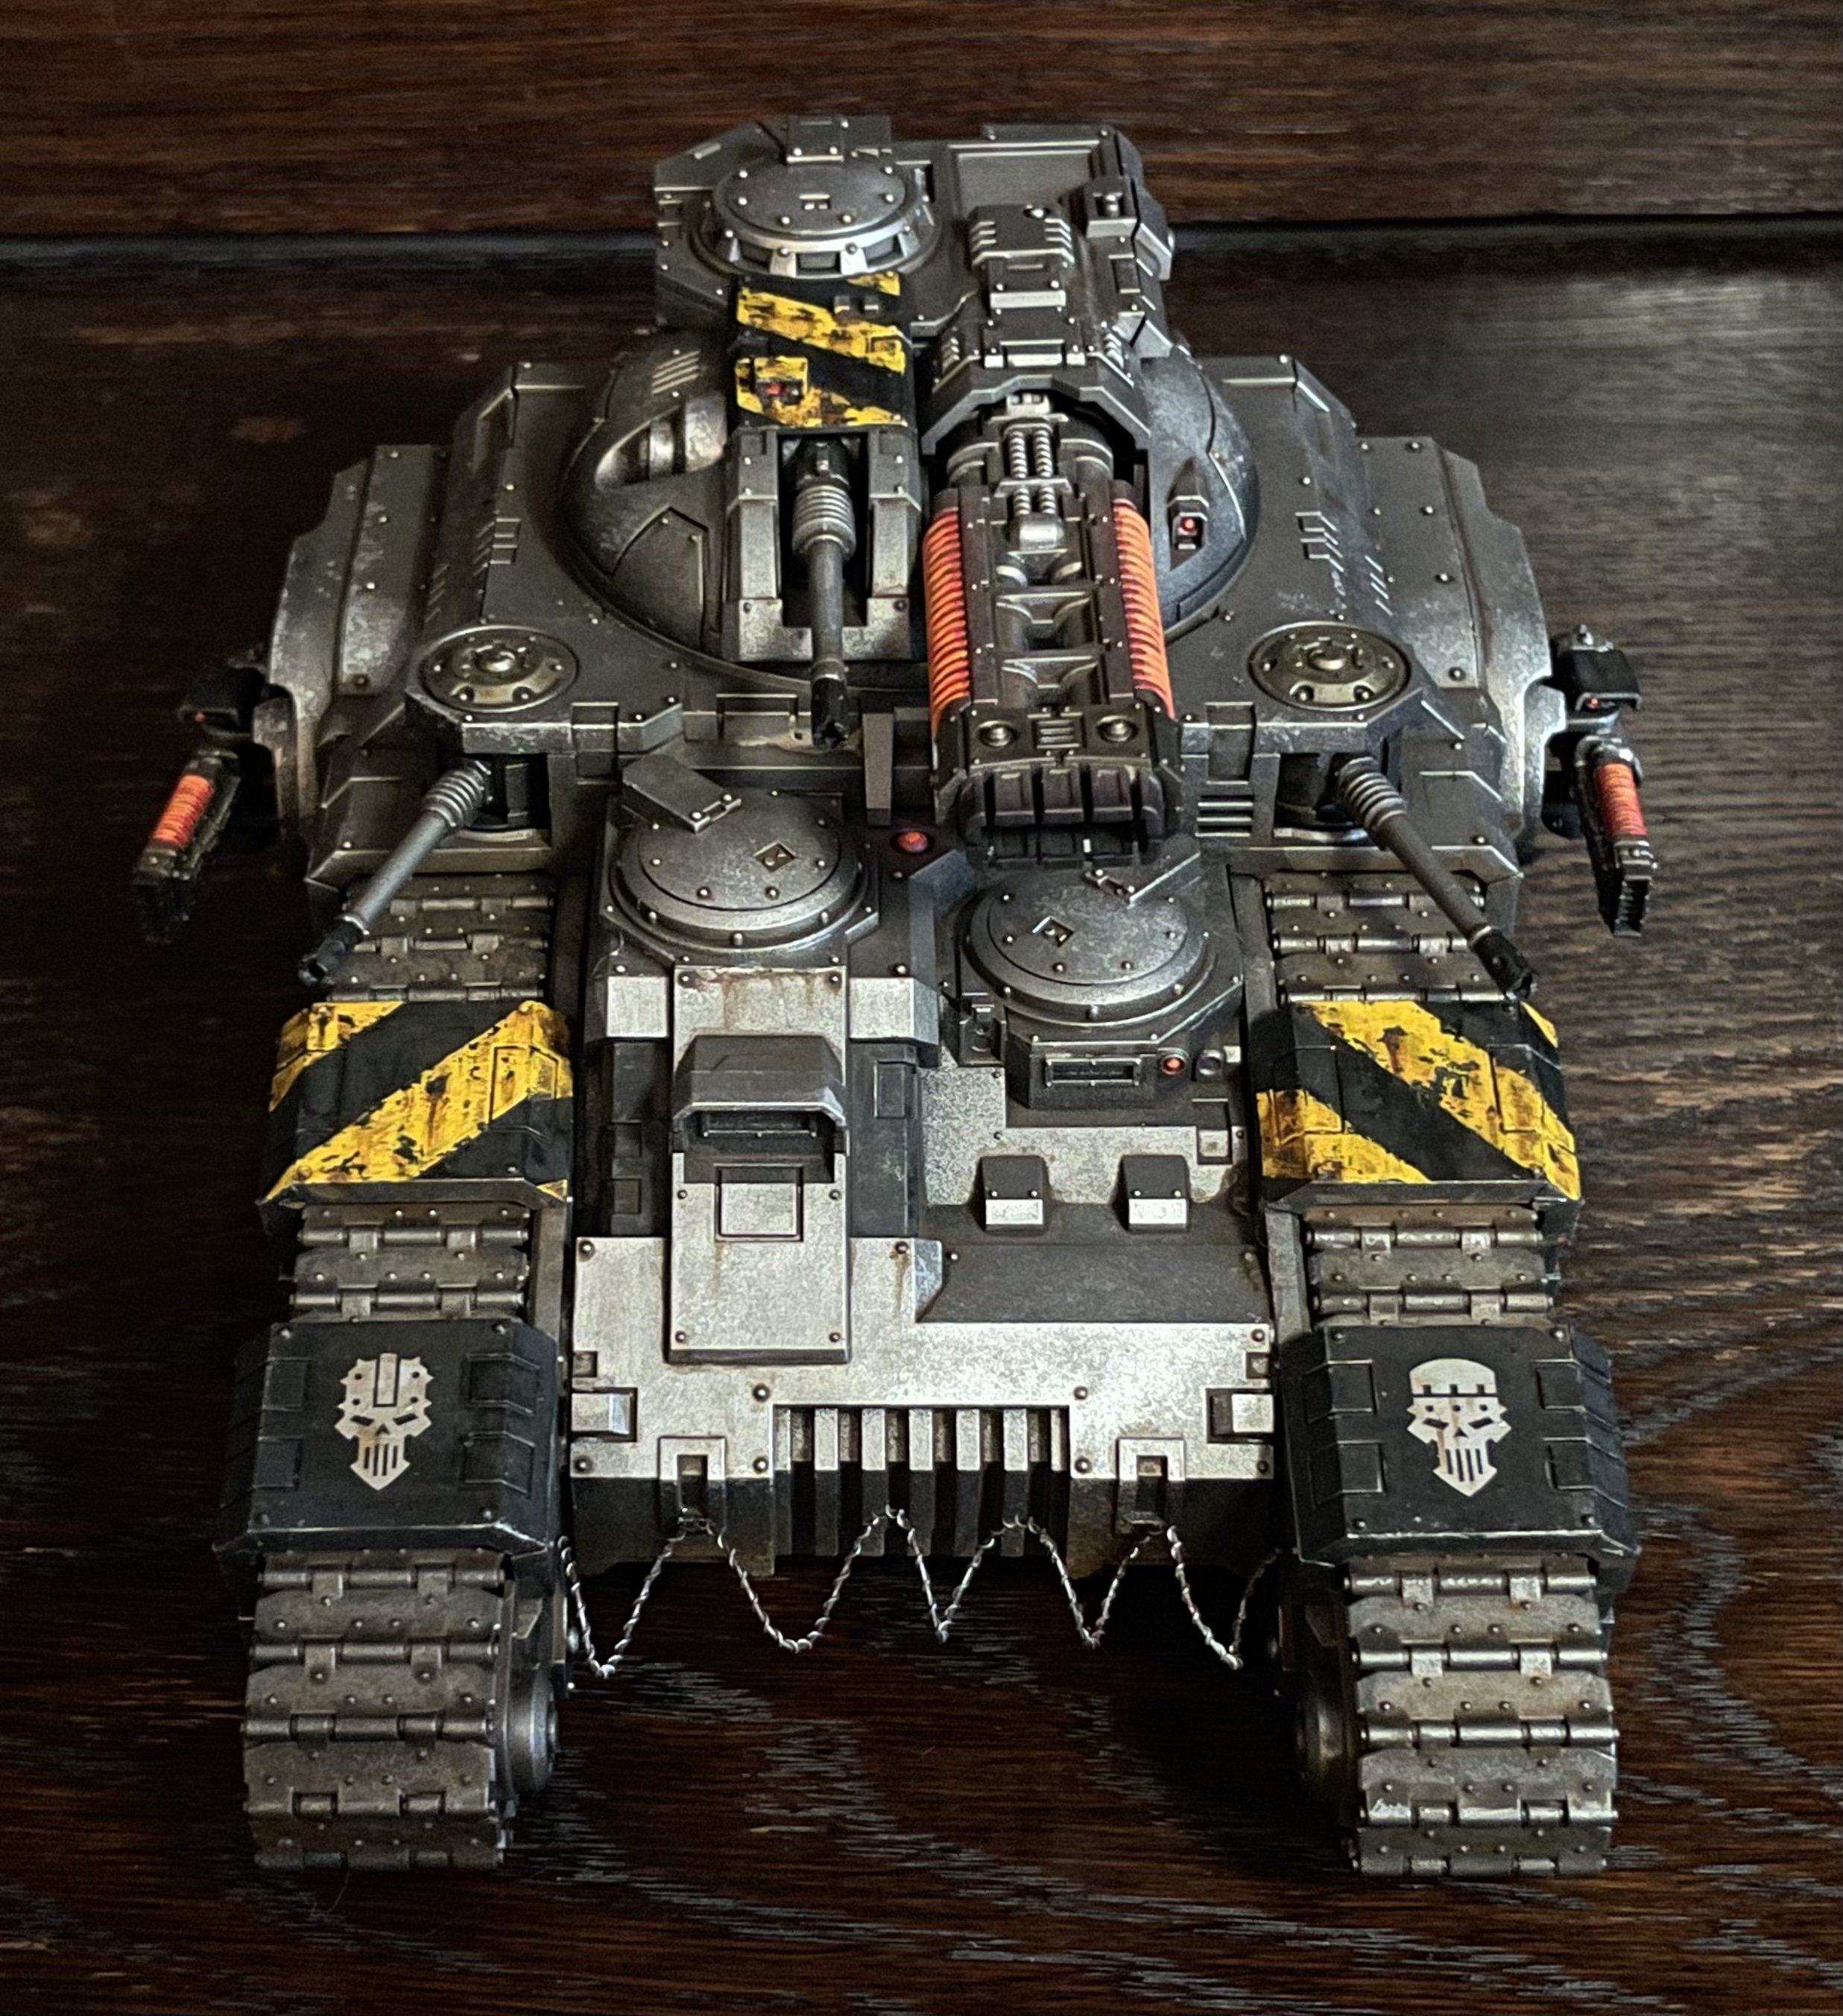
After building the model I primed it black. Then I Zenithal sprayed Leadbelcher from above.
Once dried I take a very light silver and sponge in the surface highlights. The reason for this is that it gives good control and you can introduce some textures on the otherwise flat and empty surfaces.


After this I paint the areas where I want hazard stripes in black and add a matte wash. The reason for this comes later.
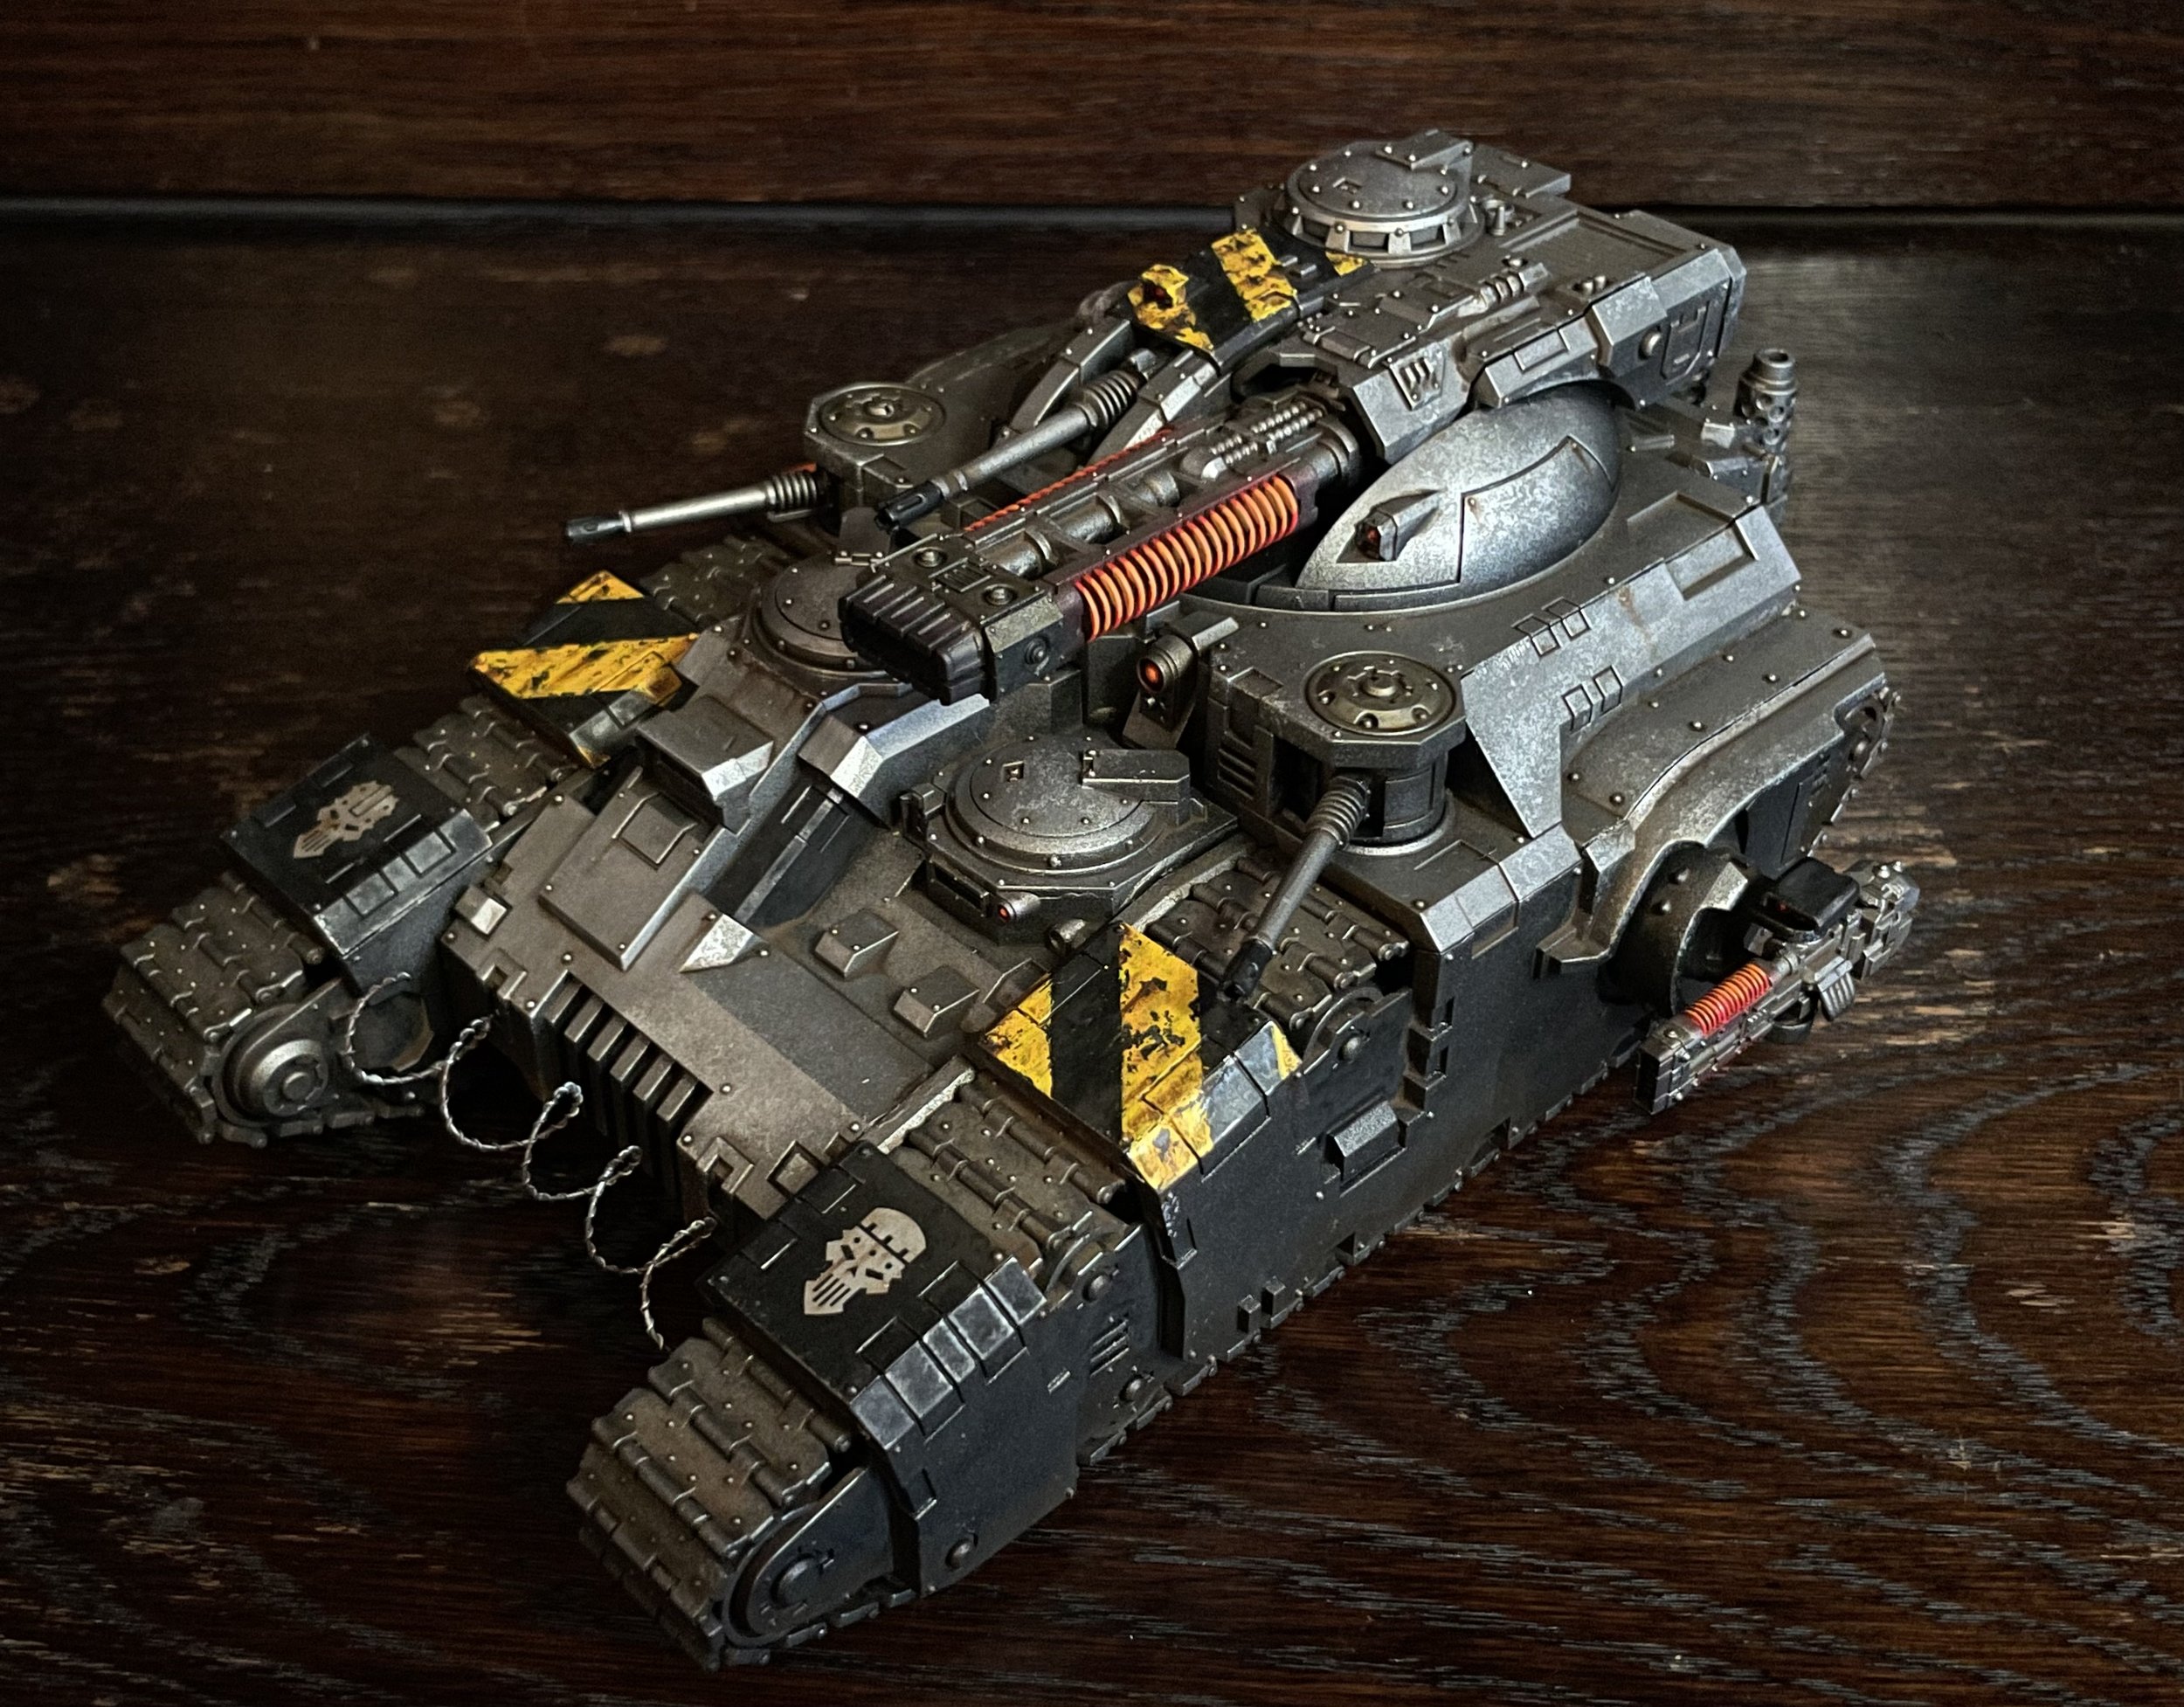
The tracks is painted with a mix of black, burnt umber and orange oil paint. This is mixed with a lot of mineral spirits. The consistency is almost as a wash but a little heavier. I dabb paper tissue to remove the exes paint.
Once dried I draw in the highlights with a graphite pencil.
After this I paint the hazard stripes and add decals.
The reason for painting yellow hazard stripes on top a black surface is this. In order to get good coverage I have to do several coats of paint. This is good because I will use a hobby knife to introduce scratches and battle damage. This means that I have a top layer to remove, reveling the black underlaying black. It looks more realistic and is much faster.
Oh I have not put a single layer of varnish on the model, even if I have started to work with oils and mineral spirits.
First off, the silver spray coat already contains more varnish than other acrylics so you already have a protective layer.
Second, just applying mineral spirits and oils will not remove any paint. It is rubbing and punching it around. So apply it, quickly do adjustments and then let it be until it fully dries.


Up to this point, everything have been quick and easy, the longest time is drying times and assemblie.
And done 😀. I am really happy with this one. 90% painted with oils. Some acrylics was used for the metallics. It takes some time between the layers, but other than that it is quite easy and intuitive to use.


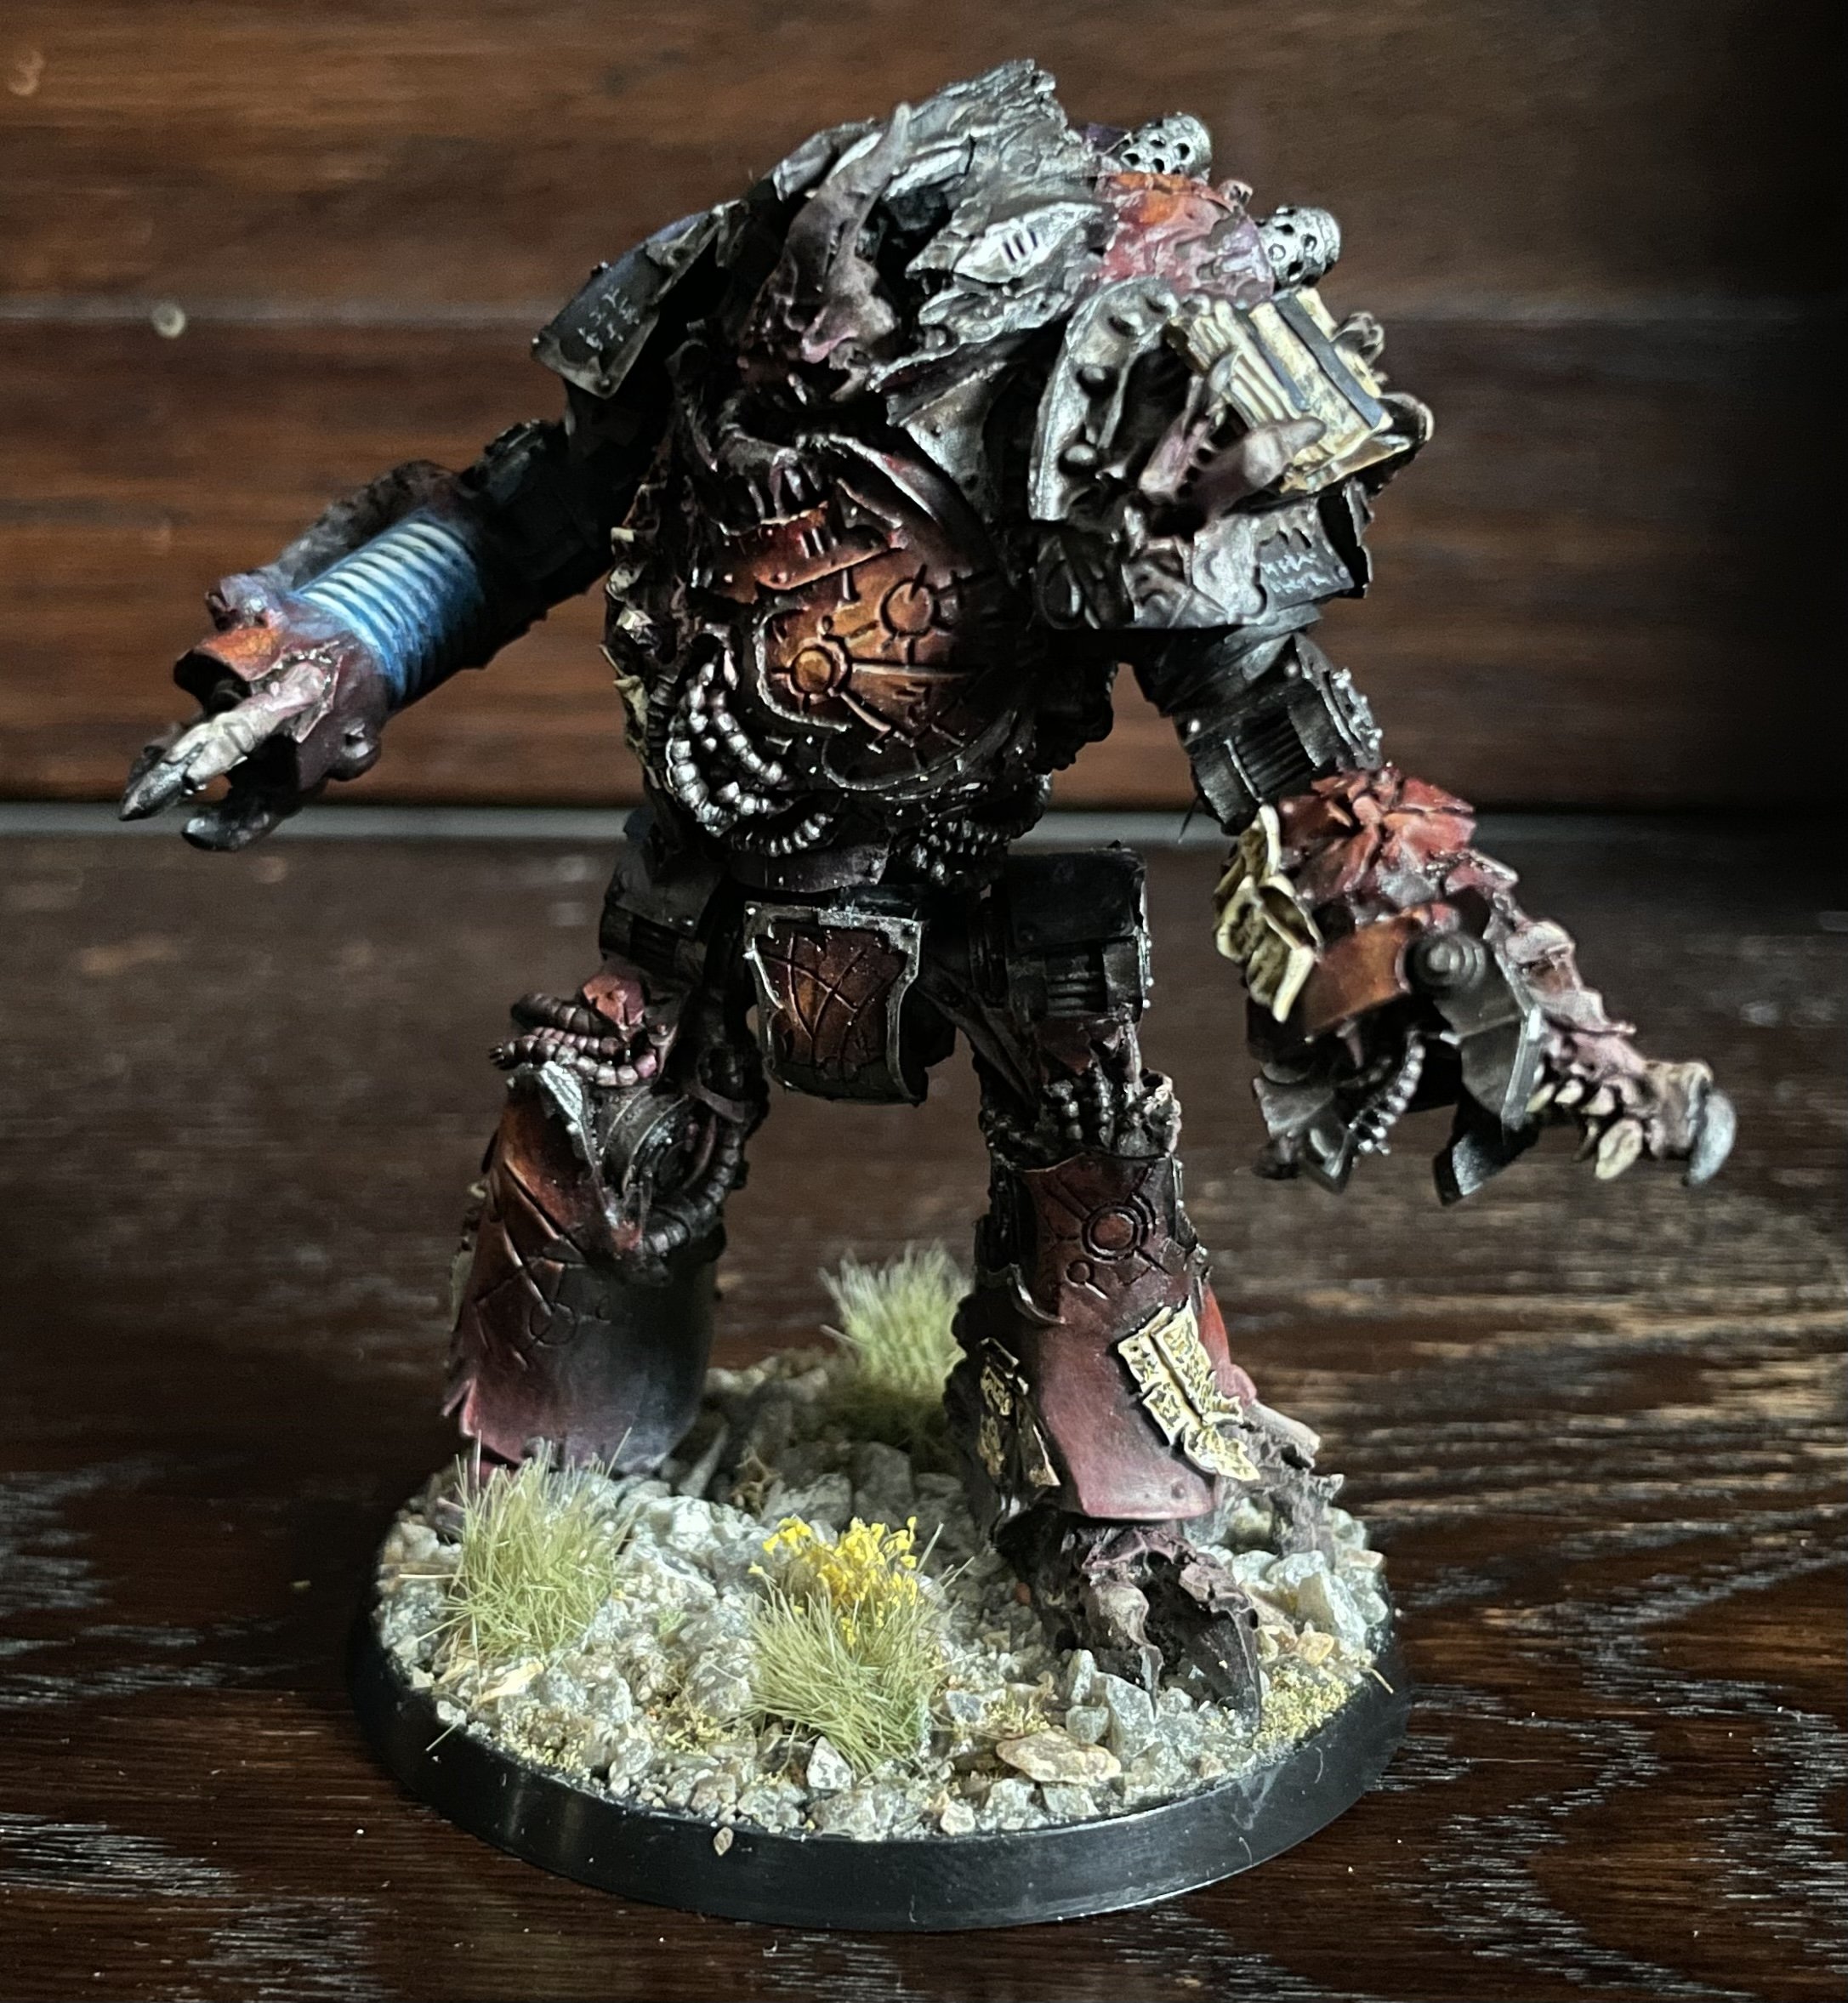

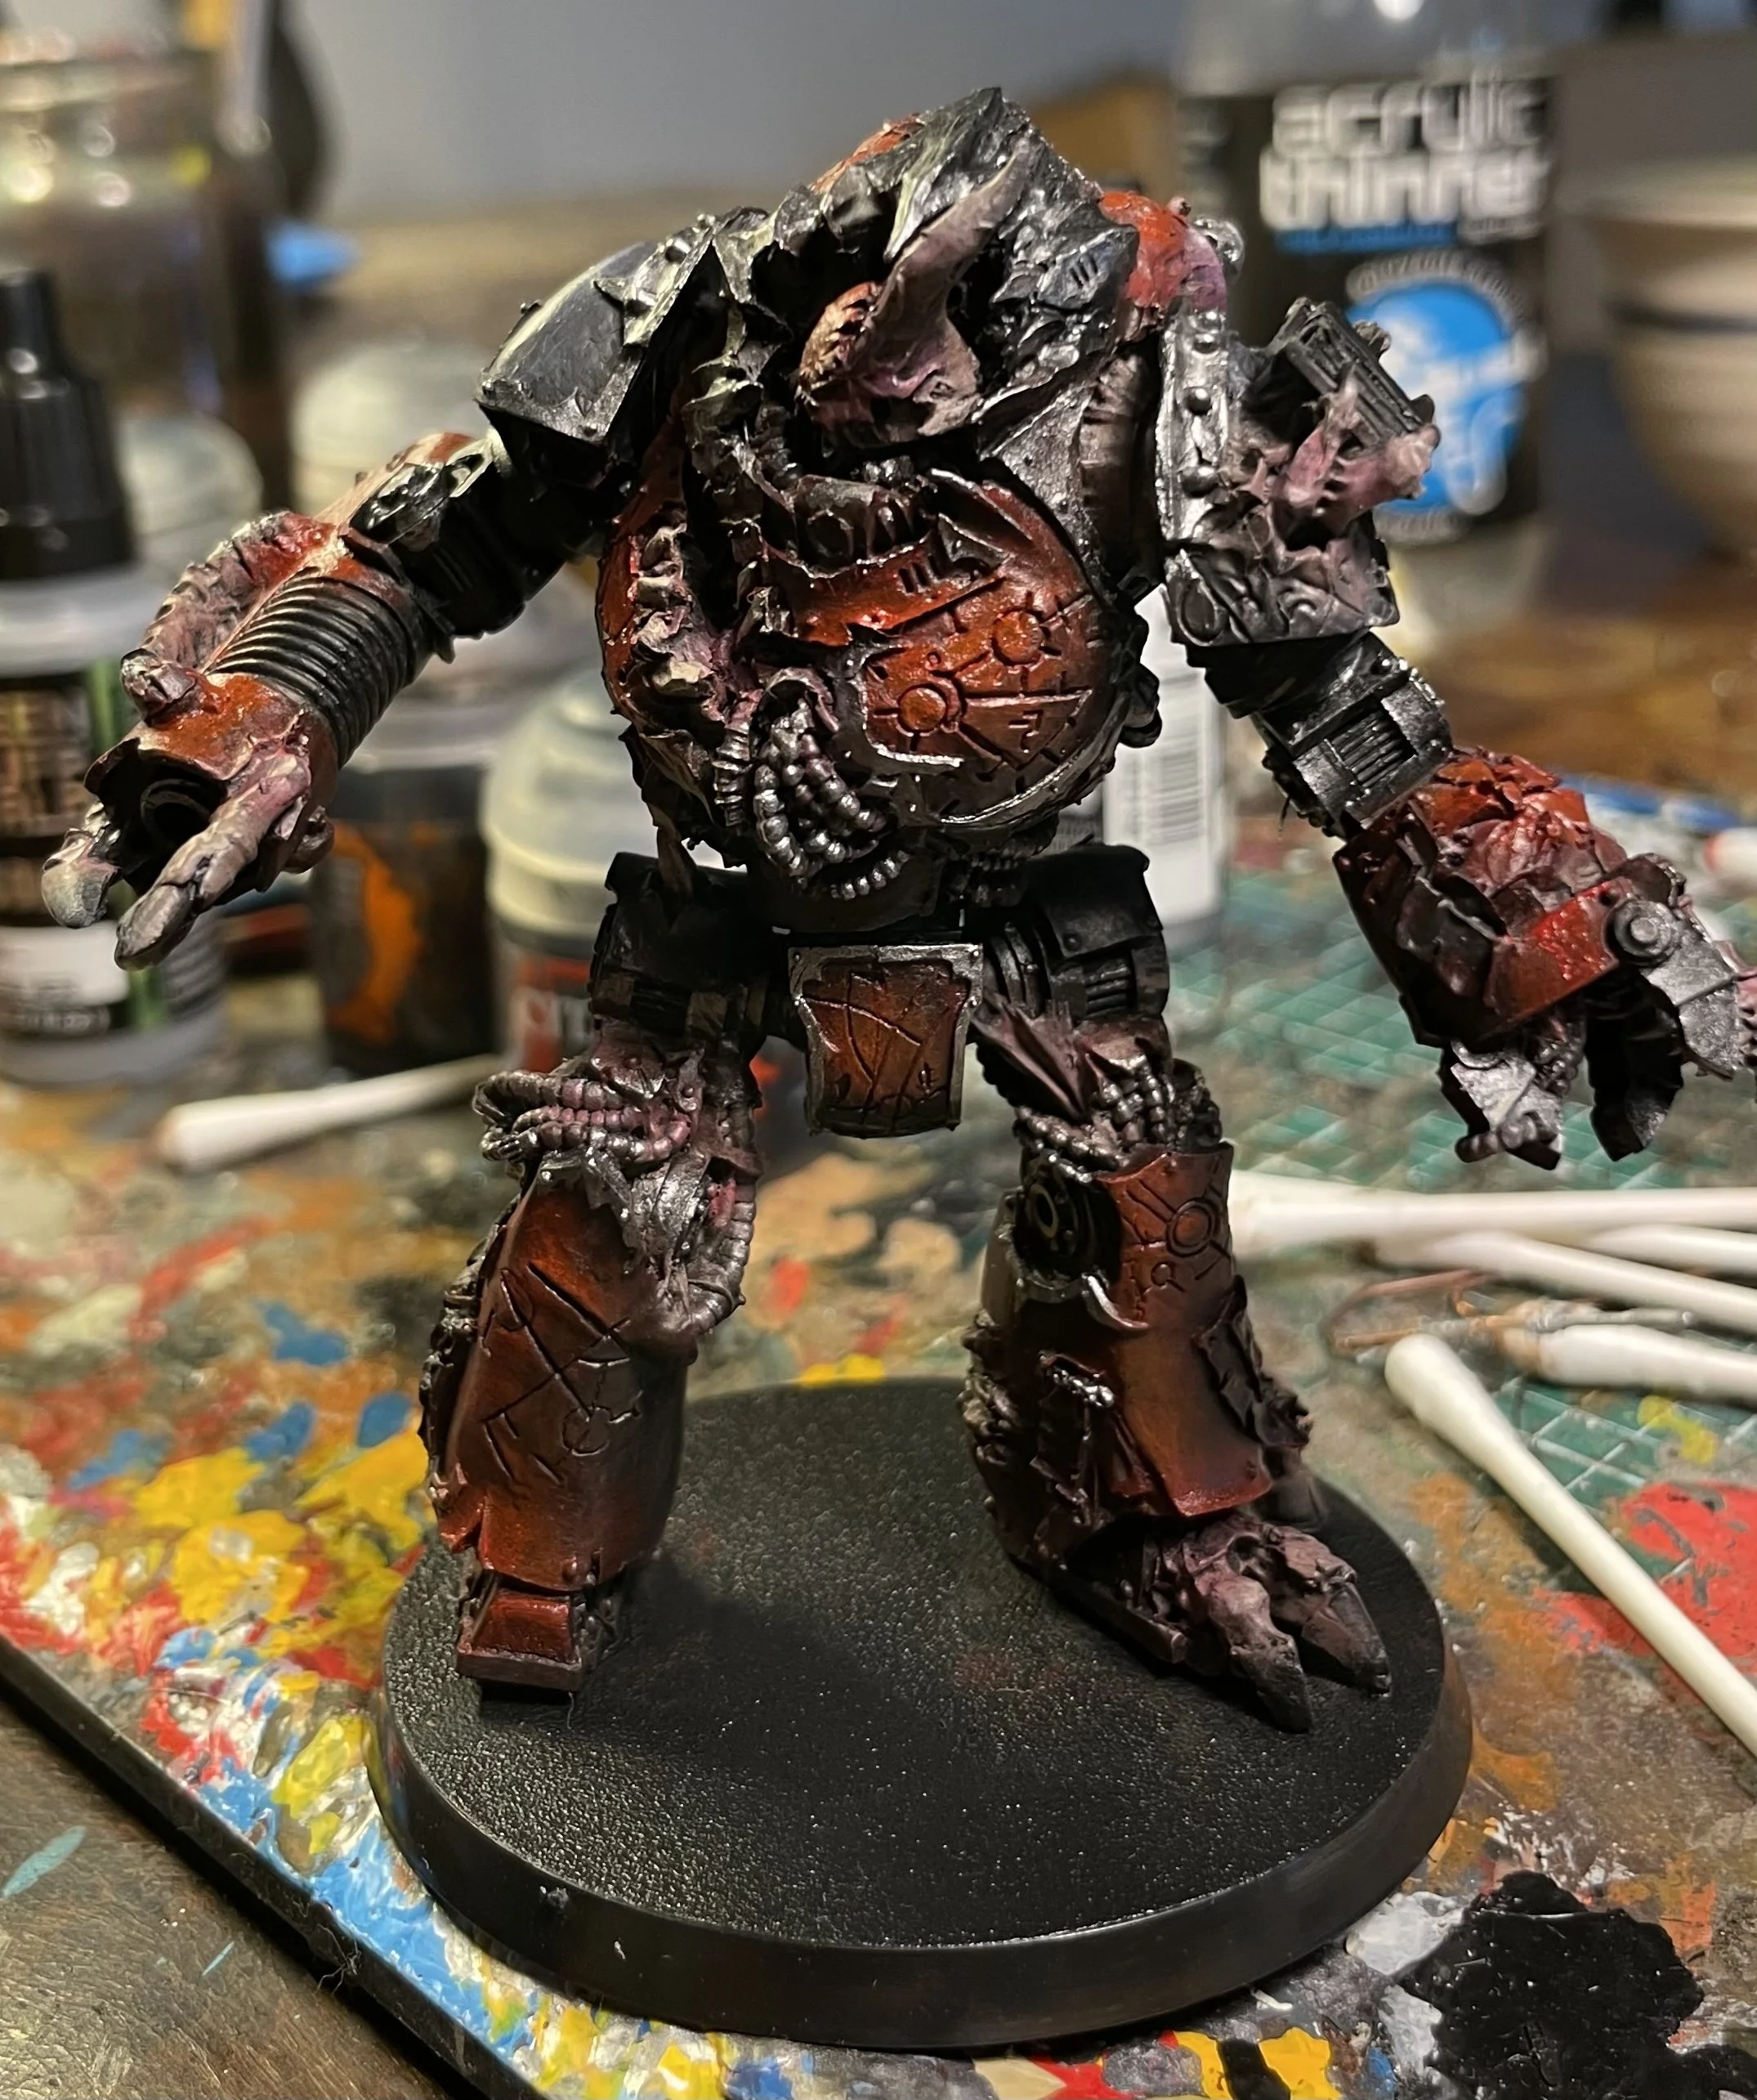
Continuing with the monsterdread. So much fun to paint, I almost don’t want it to finish. But the end is approaching and I do want to put this on the gaming table at some point 😅.


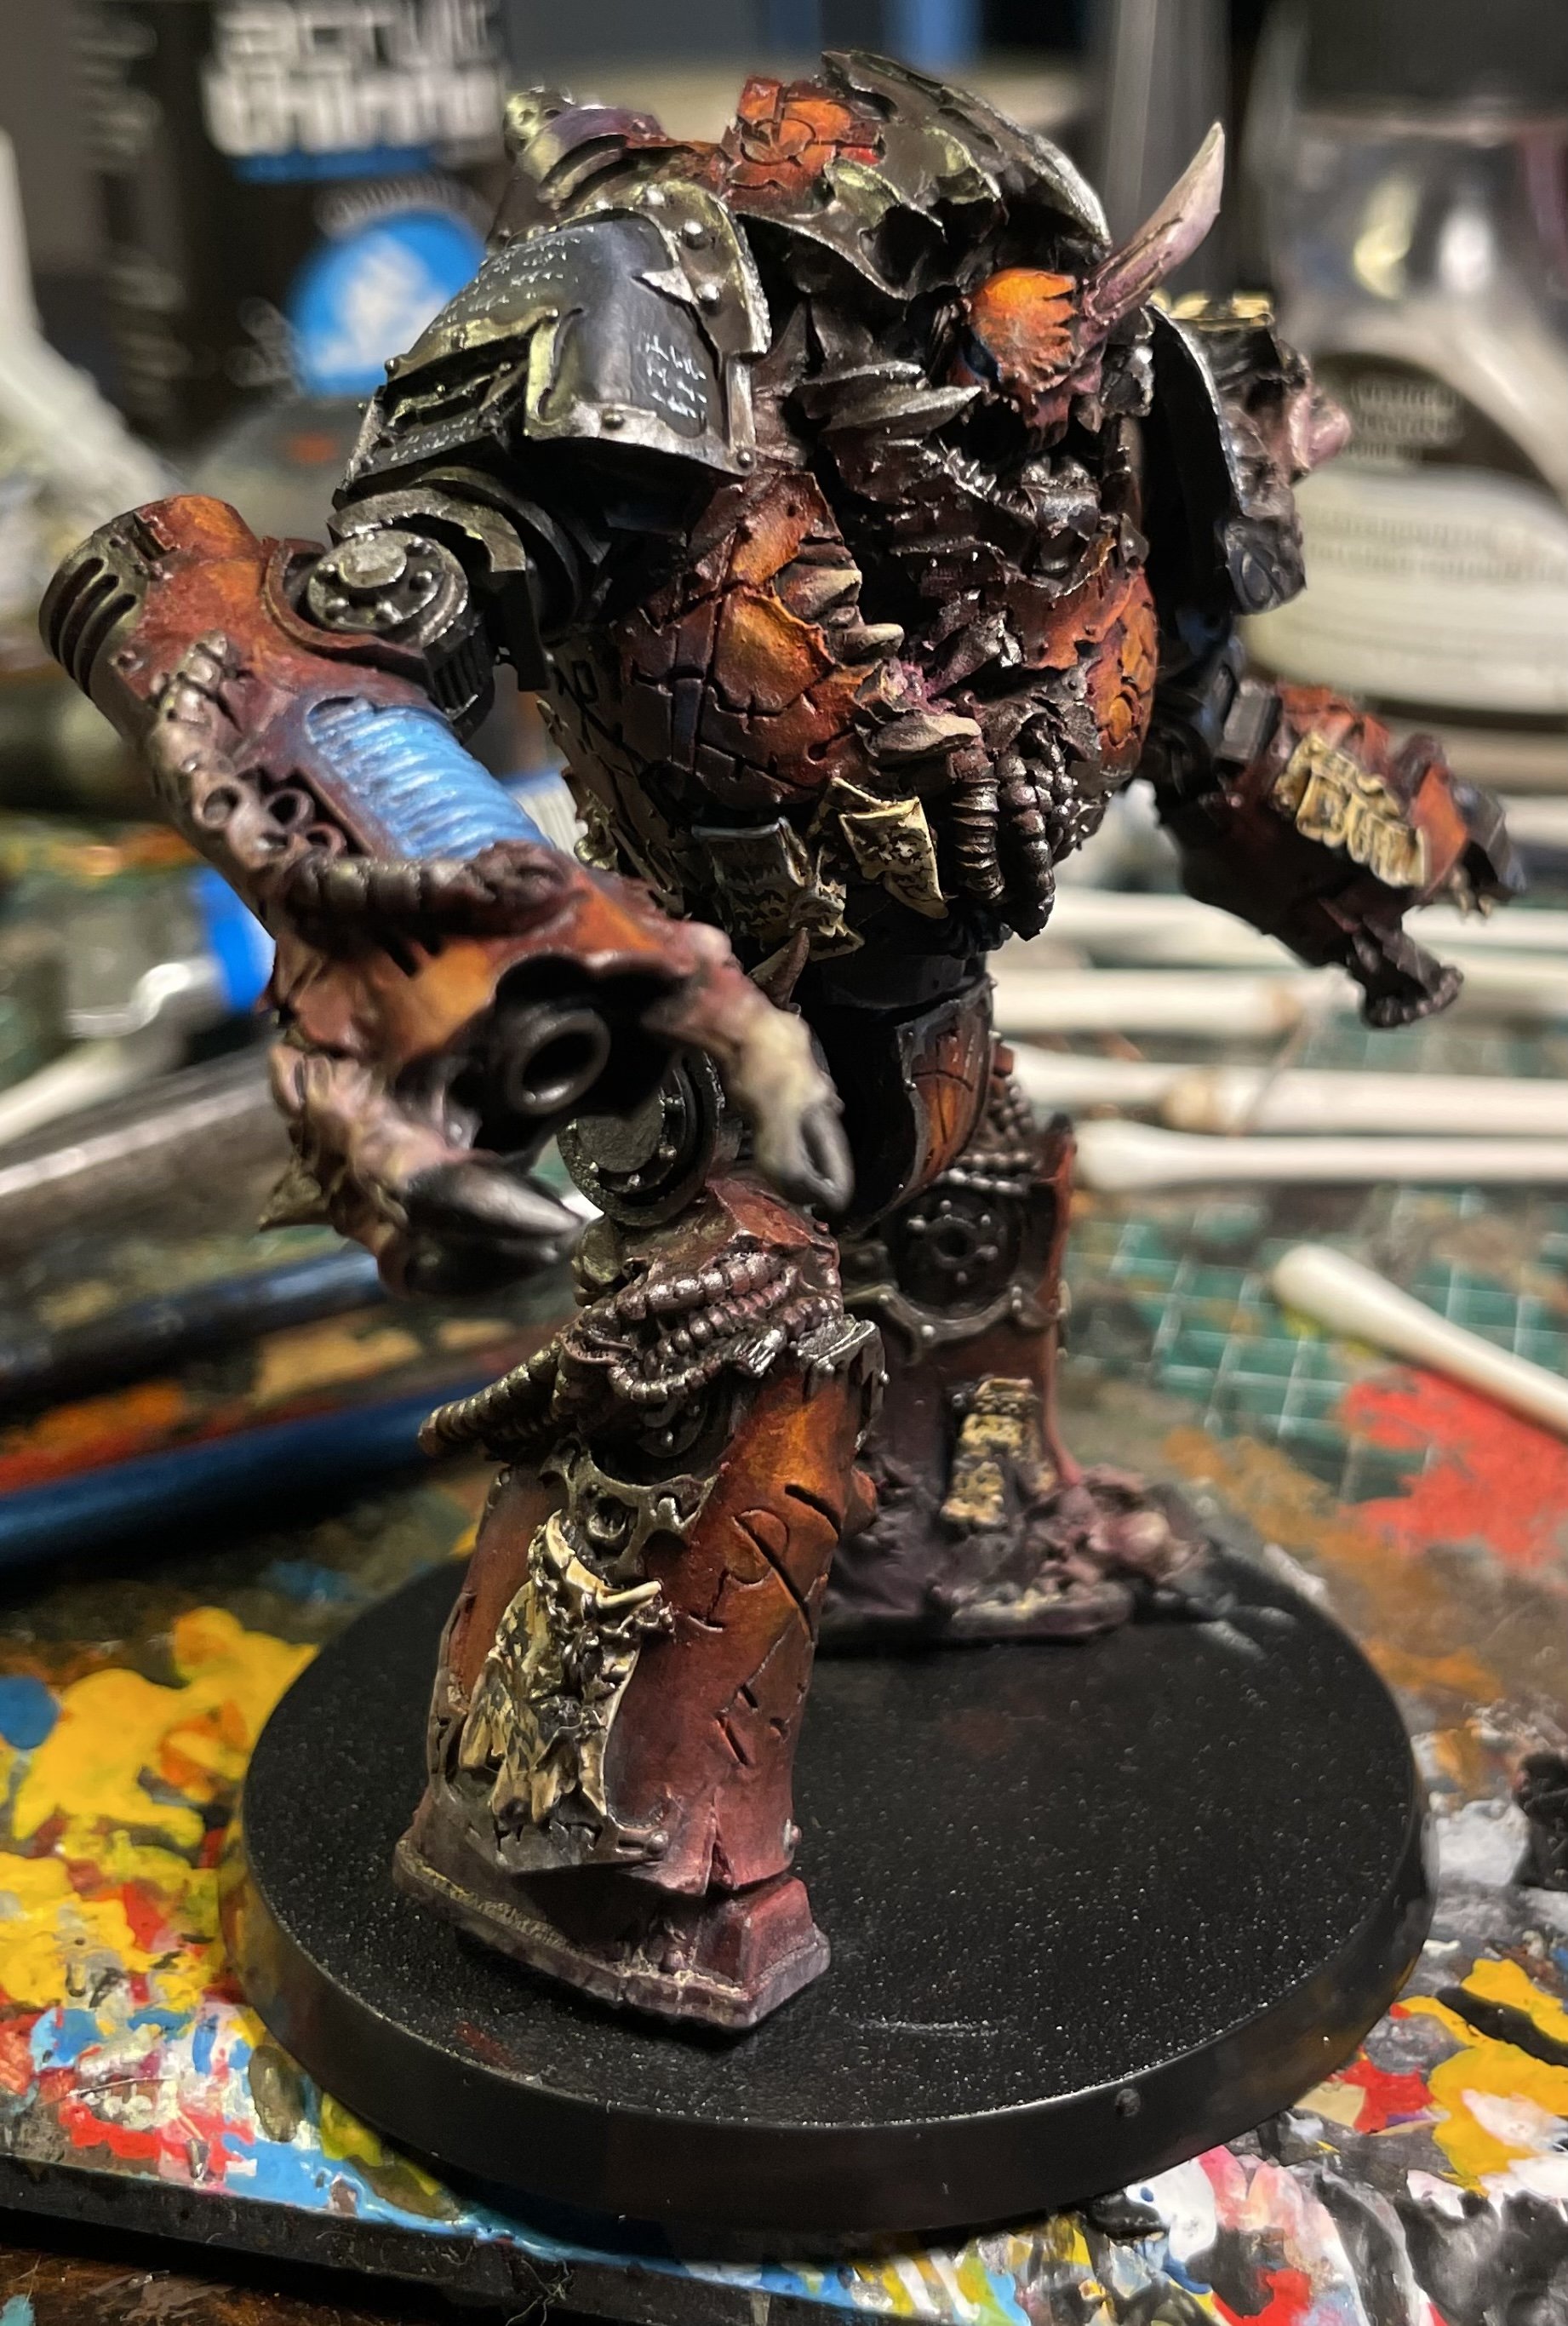
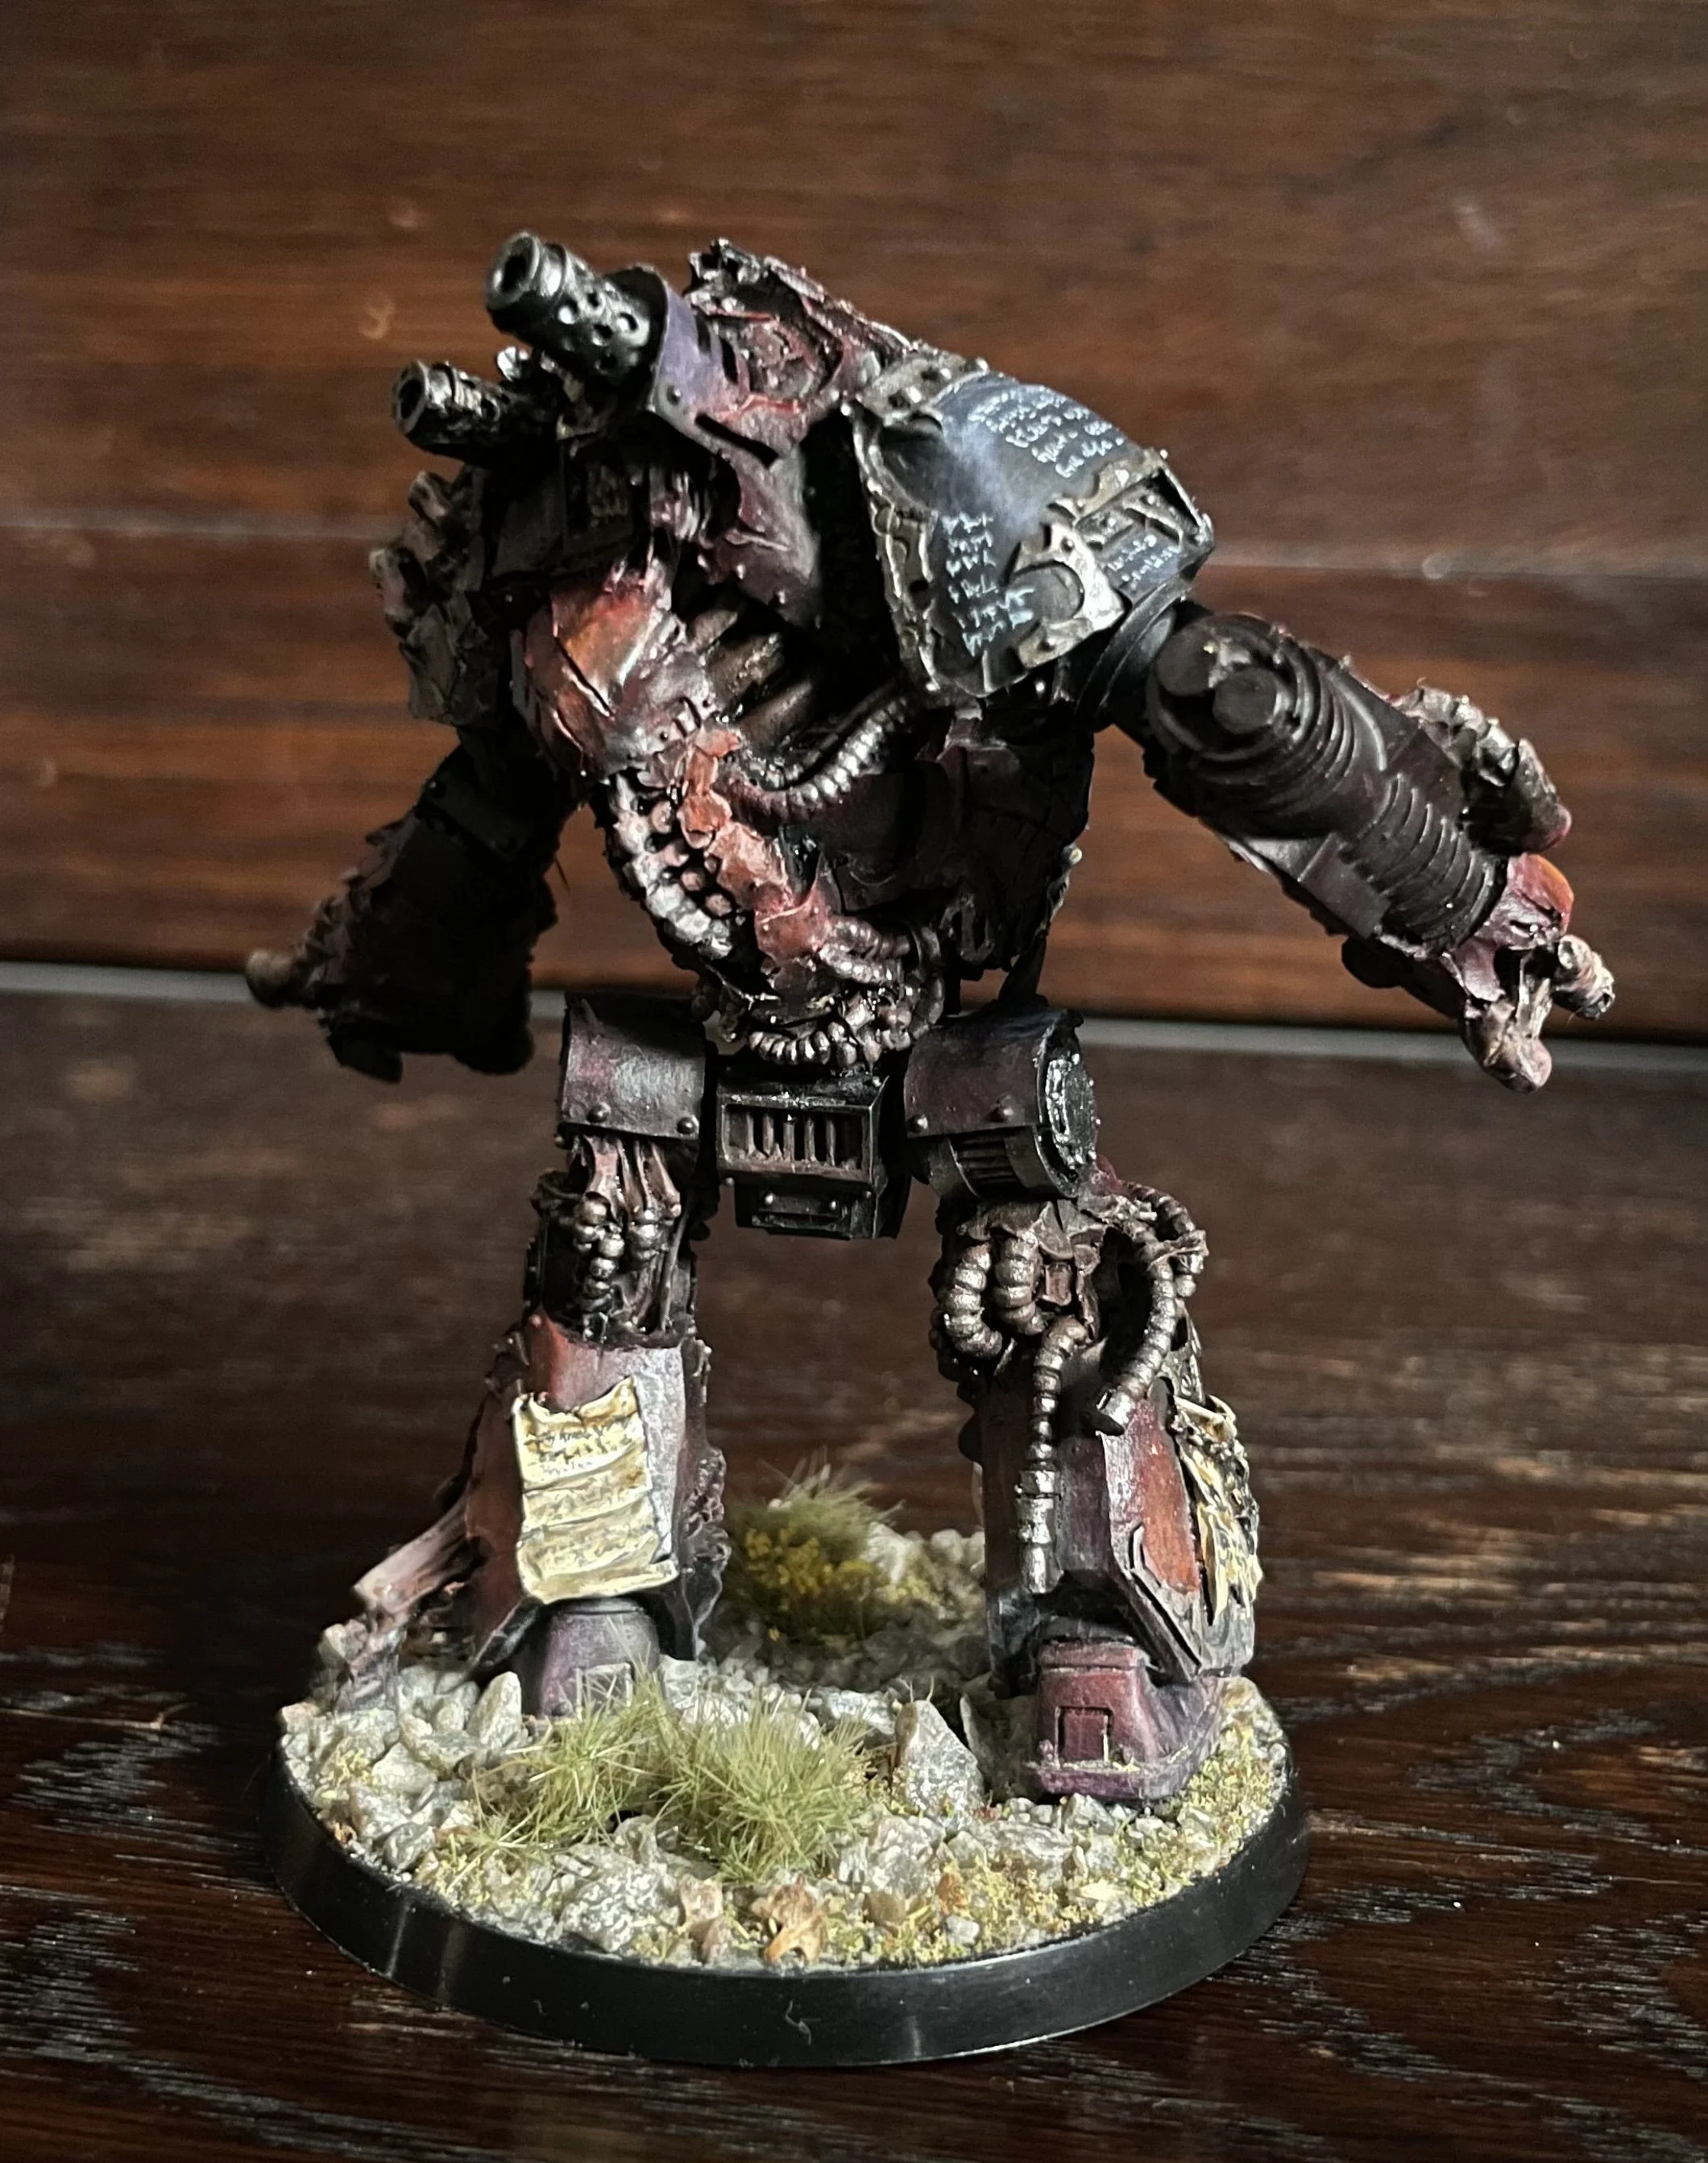
Next up on the painting table is this lovely model. The mhara gal tainted dreadnought is one of the reasons I started to collect word bearers to begin with.


So far this model have only been painted with oil paints, not counting primer and silver details. I have used oil paint for washing and surface highlights before. But I never tried to paint an entire model from base coat to finish before.
I really like it. It takes a little time, because you need to wait for each layer to dry before continue. But so far it only takes 8-12h which is fine because I only have time to paint on the evenings.
It is very intuitive when you get the hang of it. I can recommend you to try it.
I got my self a third of these lovely murder machines. A new edition and some new toys on the table, great times!


This update features some bigger changes than the previous ones. There are changes to how armour work and how you cast your abilities.
As it was before, armour just reduced the combat value and abilities was automatically cast as long as you could pay the cast cost.
Armour and casting abilities is now a dice roll. This allows you save against a large amount of incoming damage and to attempt casting abilities even if you have 0 on your ability dice.
I think this was a much better way of doing it. Of course, this have affected a large number of rules in the game so more have as a consequence been changed.
Additionally, I have added 1 special mission. The special mission is meant to be a way to just play a one-off game. Easy to set up, simple in its goal. You don’t always want to play large champaigns. Sometimes you just want to put some models on the table and roll some dice.
My intention is that there will be 2 more special missions in the future.
Hope you enjoy the changes and that you feel curious to give the game a spin.
Here we are. The stump gun is ready 😀. Now it might be time to try the game out 😅 . I don’t think I will add anything else before I have rolled some dice with this army.


